Camping 101: First Aid

No one plans to get hurt on a camping trip, but it happens.  Knees get scraped, blisters form on feet, and how many of us remember to reapply sunscreen every 80 minutes?  No matter how careful you are, injuries are bound to happen, which is why we have a few recommendations to help you prepare for those accidents and save your camping trip.

CPR, First Aid

Take a First Aid Course

We know it seems like a hassle, especially with our schedules getting busier and busier, but it's always a good idea to have at least one person on the camping trip take a first aid course.  Even better?  Make it a family affair and have everyone sign up.  Hopefully, you will never have to use any of the skills and know-how that you pick up during the course, but if something happens, you'll be glad that someone close knows exactly what to do.

The American Red Cross offers classes all across the nation.  Visit their website to find a class near you.  They also offer online courses on specific injury first aid like severe bleeding, dog and cat first aid, and basic first aid and CPR courses.

American Red Cross - First Aid Training

Buy a First Aid Kit

First Aid Kit

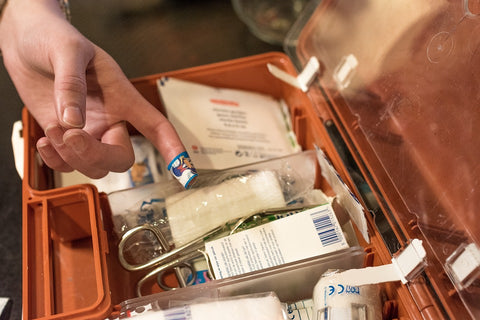
Did you remember the sleeping bags?  The tent?  The food you prepared ahead of time?  What about the first aid kit?  It's an easy item to forget, especially since it is (hopefully) used so little, but it's not something you want to be without.  There are plenty of good kits available ranging in size and price, so selecting one can be a bit daunting, but even the most basic kit is a good place to start.

We recommend buying a plastic tote with latched handles to use as your first aid container.  Why?  Well, many kits have just enough room for the items they came with and some can be down-right impossible to repack after pulling out some supplies.  The larger, clear tote allows you to add any additional items that you may require including things in larger amounts (like alcohol, iodine, and/or peroxide bottles).

Bandaged Finger, Accident

After you go through the kit, consider what you'll be doing, who will be participating, and where you will be going.  What types of injuries are likely to happen?  Will you be around open flames where burns could be possible?  Is poison ivy, oak, or sumac native to the area?  Do you have enough supplies to deal with multiple injuries? 

If you plan to be exploring out away from your campsite via hiking, for example, consider making smaller, more compact, individual kits that each person can carry.  This is especially true when space and weight is an issue during thru-hiking and other weight-sensitive activities.  Make sure that these individual kits also include any of the person's required medicines in multiple day amounts (just in case they get lost or are injured and can't make it back to camp for a refill). 

Inhaler, Asthma

Remember, in the case of an emergency, call 911!

First Aid Supply List

This is by no means an exhaustive list and every item on here may not be necessary depending on what you plan to do or where you go, but hopefully this list will help give you a better idea of the kinds of items you may need to handle a camping injury.  When in doubt, talk to your first aid trainer or your general practitioner to get a better idea of what should be included in your kit or how to use something properly.

Most of these items can be found at your local pharmacy or supermarket store.

Bandages

  • Adhesive Bandages of various sizes
  • Non-Stick Sterile Gauze Pads of various sizes
  • Wound Closure Strips (Butterfly Bandages)
  • Triangular Bandage (for a sling)
  • Medical Adhesive Tape
  • Moleskin (blisters)
  • Rolled Gauze
  • Hemostatic Gauze (stop bleeding)
  • Liquid Bandage

Creams/Ointments

  • Antiseptic Wipes
  • Antiseptic Hand Cleaner/Soap
  • Antiseptic Solution (like peroxide)
  • Calamine Lotion
  • Hydrocortisone Cream
  • Insect Bite Swaps/Ointment
  • Sunscreen
  • Sunburn Relief Gel

Tools

  • Tweezers (small tipped for slivers)
  • Paramedic Sheers (blunt-tipped)
  • Thermometer
  • 10cc Irrigation Syringe
  • Small Flashlight and Batteries
  • Splint (finger, SAM)
  • Tick Removal Tool
  • Safety Pins
  • Cotton Tipped Swabs
  • Scalpel with #12 or #15 blade

Medications

  • Any Personal Medications
  • Acetaminophen and/or Ibuprofin
  • Lozenges (sore throats)
  • Antihistamines
  • Diarrhea Medication
  • Antacid Tablets
  • Aspirin (heart attack related)
  • Oral Rehydration Salts
  • Glucose (to treat hypoglycemia)
  • Epinephrine Autoinjector

Other

  • Disposable Ice Packs
  • Disposable Non-Latex Gloves (several pairs)
  • Medical Information for Individuals (list allergies, etc)
  • Medical Waste Bags
  • Sharps Box
  • Emergency Heat-Reflecting Blanket
  • Notepad (waterproof) with Pencil and/or Pen
Continue reading

Camping 101: Activities for Everyone

There is a lot of planning involved when going camping.  What gear should you bring?  Do you have enough food?  What about clothes?  It's easy to get lost in the chaos of planning what to bring and completely forget about another vital aspect of camping ...

What are you going to do when you get there?

Now some of you may be spontaneous and plan to improvise activities along the way, and that's fine, but even for those on-the-fly campers it's a good idea to have a few backup ideas planned out ahead of time.  If the weather changes, for instance, and you find yourselves confined to the tent, having a set of cards or a board game available may make all the difference.

Today, we would like to cover some of the activities that you and your family and/or friends can do while camping.  While choosing activities, keep in mind the ages of those camping, their skill levels, their interests, as well as things like cost or accessibility.

Girl playing in sand

Water Activities

If water is easily accessible at or near your campsite, you should definitely consider how you plan to utilize it.  Swimming is a classic camping activity and many campgrounds have beaches, which may or may not have lifeguards on duty.  Plan ahead and bring appropriate PDFs for kids while swimming, for everyone while enjoying boating activities, and for your pets if they will be joining you on the water.  Ask at the check-in desk for information about rentals if you don't have canoes, SUPs, or kayaks of your own.  

  • Swimming
  • Canoeing, Kayaking, or SUPing
  • Boating
  • Personal Watercraft (Jet Skis)
  • Skiing, Knee-boarding, or Wakeboarding
  • White-water Rafting
  • Sandcastle Building
  • Snorkeling
  • Fishing
  • Water Sponge Fight*

* Instead of water balloons, which make a mess, why not use sponges instead?  In my family, we cut a few sponges into strips, line them up side-by-side, and tie the strips together in the middle to create a "sponge ball" that can be reused again and again.  More fun, less mess.

Hiking

Adventure Activities

For those camping at primitive sites or off-grid areas, your campsite might not have much to offer in the way of activities.  You can still fill your camping trip with plenty of exciting adventures.  Just make sure to be safe, plan ahead, and bring appropriate gear.

  • Biking
  • Horseback Riding
  • Hiking
  • Wildlife Viewing
  • Rock/Mountain Climbing
  • Nature Scavenger Hunt
  • Wildlife Art/Painting
  • Photography
  • Map Making
  • Geocaching (see earlier post to learn more)

Playing Cards

Tent Activities

No matter how well you plan, Mother Nature doesn't always cooperate and there are times when you may find your fun-filled weekend cut short by a rainstorm.  That doesn't have to mean the end of your fun, however, and if you plan ahead even those rainy days can produce some amazing memories.

  • Cards
  • Board Games
  • Stories
  • Coloring/Crafts
  • Puzzles
  • Reading
  • Play Music/Sing

Painting Outside

Campsite Activities

Sometimes it's nice to stick close to the tent rather than travel to an activity.  Be sure to avoid entering other campsites or disturbing other campers.

  • Hide-and-Seek
  • Tag
  • Play Catch
  • Have a Friendly Competition
  • Limbo
  • Yoga*
  • Drawing in the Dirt
  • Treasure Hunt
  • Bug Hunt
  • Painting/Nature Crafts

* Get the whole family involved by taking turns creating new poses inspired by things found in nature.

Playing Guitar

Nighttime Activities

While camping, don't think the fun has to end when the sun goes down.  Besides the classics, like making s'mores and telling ghost stories, there are plenty of other family fun activities to do after dark.  Just be sure to follow any quiet hours your campground has in place and remember to be careful exploring the dark as it is easy to get lost.

  • Stargaze
  • Build a Fire
  • Tell Stories
  • Sing/Play Instrument
  • Capture the Flag
  • Shadow Puppets
  • Hide-and-Seek/Sardines

We hope that this list gives you a few new ideas for your next camping trip and helps you to create fun-filled memories that last a lifetime.  Have fun and get camping!

Continue reading

Camping 101: Introducing the Next Generation

Everyone has a different idea of what constitutes camping.  Some can head out with little more than a hatchet, flint, and granola bar and last for weeks on end.  Others prefer to roll in to a campsite with full hook-ups and free wi-fi.  However you camp, camping alone, camping with adults, and camping with kids require different levels of preparation and execution. 

Today, we're going to provide some tips and tricks for introducing the little ones in your life to the camping life.

Family

1. Practice

This is a vital step, especially for those with young kids.  There are a lot of unexpected differences when sleeping in a tent outside.  For one thing, the sun sets later than most kids' bedtimes and rises long before they typically wake.  It's also a shock at how quiet it can be when sleeping outside.  The normal drone of furnaces, AC units, and appliances is replaced by silence ... with an occasional hoot or howl to spice things up.

To make it easier, take your kids on a test run in the backyard.  Explain the types of noises they will hear and what they are and what they mean.  Don't be surprised if they wake you up a few times through the night.  Don't dismiss their fears, but do your best to explain exactly what they heard and remind them that you are still safe in your backyard.

And if they can't last, don't be ashamed to retreat back to the house.  With young children, it can take a few tries before they are comfortable with the sounds of the outside world during the night.  Sometimes letting them bring a treasured item to sleep with (like a blanket or a favorite stuffed animal) can ease the transition.

2. Let the Kids Sleep in the Middle

This may or may not be an issue depending on your children's ages, but it is an option to consider.  Sometimes, letting the kids sleep in the middle of the tent provides a sense of comfort.  It can also keep them warmer, prevent them from rolling off their sleeping pads, and ensure that they don't wake up in the middle of the night and, in a sleepy state, slip outside to return to their bedroom (it happens).

3. Keep the Bedtime Routine

Sometimes when everything else has changed, this the only aspect that you can keep the same.  Having a familiar process before bed, even if the bed and bedroom have changed, may help kids adjust to the camping life easier.  So remember to bring some bedtime books, sing those songs, or whatever else you normally do at bedtime to ease kids into the process.

S'mores

4. Make Meal Time Fun

Camping can sometimes feel like more work than it's worth, especially when you have kids.  Meals still have to be prepared, dishes still have to be washed, and your menu is often limited.  Get the kids involved by planning meals where they can help.  Getting a cast iron pie cooker allows you to make toasted sandwiches over the campfire  Experiment with the fillings and let your kids make their own (help them with the actual cooking).  They also make great dessert sandwiches with things like chocolate hazelnut spread and sliced bananas inside (tastes a bit like chocolate chip banana bread).

And, of course, don't forget the s'mores.

5. Bring the Binoculars, Magnifying Glasses, and Telescopes

One of the great things about camping is the easy access to nature.  Why not let your kids explore it in a new way by bringing along special viewing gear?  Have them try to spot wildlife in the distance or check out the fuzzy underside of a leaf. 

On my last camping trip with the family, my daughter spent nearly 30 minutes sitting on a rock with a pair of binoculars scanning the opposite mountain for dinosaurs.  She was convinced that if dinosaurs still lived, they would live out there in the remote mountains.  Instead, she saw two deer, a flock of turkeys, and another hiker visiting the same valley.

6. Buy Them a Camera

I've mentioned this in another post, but it should be addressed again.  Children are often fascinated by cameras and love taking pictures of things that interest them.  Just as you take photos to remember your favorite times and places, allow them the chance to do the same.  Kid cameras are built to be bumped around and can be found at a reasonable price.  Plus, in this age of digital information, seeing the pictures doesn't have to cost you any more than the price of a reusable SD card.

Then, when you return home, you get to experience their joy again as they show family and friends the pictures they took while out exploring.

Kids on Carts

7. Let them Choose an Activity

Often it's the parents who set the agenda for any vacation, but why not let your kids make a few choices?  Letting them choose an activity to do will often get them far more excited about the trip itself.  If they aren't sure or if options are limited, pull together a list of activities for them to choose from to help.  Letting them make some of the choices also helps to boost their confidence and comfort with trying new things.

The best part?  This applies to everyone in the family.  Teenagers who seem less then enthused to be dragged along on a family camping trip may perk up a bit if they find that they can choose an activity. 

8. Start Small and Close

Like most new things, kids can take time to adjust and accept, so with that in mind just be sure that your first few trips to the wild are short and close.  Plan a single overnight trip to a familiar place like a family member's yard.  Then try a short weekend trip to a nearby campground.  Work your way up slowly and let your kids get used to the camping lifestyle before you tackle a week-long trip to a primitive spot in the mountains.

9. Surprise Them

It's always fun to surprise your kids, but especially so during a vacation.  When planning, keep a special activity quiet until you arrive and save it for a day when they need a little pick-me-up.  Whether it's a fun-filled activity, a trip for ice cream, or a special project, surprising your kids with the unexpected is sure to keep them talking about this vacation for years to come.

Girl Sleeping

10. Give Them a Day to Recover

This goes for parents as well.  Vacations can be exhausting.  Your sleeping schedule is often tossed out the window, your activities can be physical exhausting, and when you get home, you still have to unpack.  Knowing this, why not plan your vacation to end a full day before you have to return to normal life?  Giving your family and yourself that extra day to recover can make all the difference.

Continue reading

Camping 101: Cast Iron

Next to sleeping, eating is probably one of the most common reasons why people don't like camping.  We get it.  Cooking over a portable stove or campfire isn't exactly the same as tossing something in the microwave or baking in an oven.  And we all agree that no one wants to eat burgers or hotdogs for every meal.

Thankfully, with a few well-chosen tools and a little know-how, you can master camping meals with ease.  Our go-to camp cooking item?  Cast iron.

Cast Iron

Why Cast Iron?

Okay, so cast iron obviously isn't the right choice if you are going to be carrying all of your gear ten miles in to your campsite or in any other situation where weight of gear is important.  But let's face it, many of us, especially beginners, are car campers.  We drive up to our campsite, unload our gear, and usually bring far more than we ever need.

For the car campers out there, cast iron is a wonderful addition to your camping gear.  It comes in a wide array of sizes and shapes, allowing you to select the perfect set for your needs.  And although it does not heat evenly, it does hold heat well, so after a good pre-heat on the fire it will be ready to cook anything from fried eggs to roasted chicken.  For those who have never used it before, we know how intimidating it can be, but don't let it scare you.  After learning a few basic care tips, we're sure you'll be confident enough to try it during your next camping trip.

Cooking with Cast Iron

Seasoning

No, we're not suggesting that you sprinkle a little paprika on your cast iron.  In this case, seasoning refers to a layer of polymerized oil that literally bonds to the metal of the pan.  Most modern cast iron comes pre-seasoned, but a little extra never hurt.

The basic process to season a pan is to heat it for a long time (until the heat eventually spreads throughout the entire skillet leaving no obvious hot spots), rub it down with an oil, let it cool, and repeat.  Specific directions will likely come with your cast iron when you buy it. 

The best way to season your cast iron?  Use it!  Use it as often as possible.  Every time you cook, that layer of seasoning builds up a little more.  And though we don't recommend using your cast iron to beat off a bear or bash in a tent stake, you also don't have to treat it like fine china either.  That layer of oil has literally bonded to the metal, which means that using metal utensils or a rough sponge won't hurt it.

Cooking with Cast Iron

Cleaning

For simple messes, try wiping it clean with a cloth or paper towel.  Don't worry about removing all of the surface oils as they will help to protect the iron.  If you have a few stubborn spots, a metal spatula may be able to scrape them away. 

For the really difficult cooking residues, use soap and water.  That's right, soap and water won't hurt your pan as long as you take a few precautionary measures afterward.  Use soap and give it a scrub with the rough side of a sponge.  When you are done, make sure to dry it thoroughly.  We recommend reheating it on the stove to evaporate away the last of the moisture.  Although soap won't remove the layer of seasoning, left-over water is an invitation for rust.  Once the pan is good and hot, add some oil and rub it down (carefully so as not to burn yourself).

The type of oil matters!  For those who use their cast iron regularly (every few days or so), almost any oil will do.  But for anyone planning to store their cast iron for a while (a week, a month, etc.), only use heavily saturated fats like coconut oil, butter, or lard.  They are more stable at room temperature and take longer to go rancid.  And don't use a lot.  Just enough to give it a little luster.

When you store it, be sure to keep the cast iron in a well ventilated area.  Humid air can be just as dangerous as standing water given enough time. 

Cooking with Cast Iron

Cooking

Although your cast iron can be used to cook just about anything, there are a few things to keep in mind.  First, as we mentioned before, cast iron is horrible at heating evenly.  Thankfully, there are ways around this.  We recommend a good pre-heating at low heat.  This allows the heat to spread slowly throughout the entirety of the pan.  Just be sure to use a heating mitt or pad when grabbing the handle.

If your pan is properly seasoned, the food inside should never come in contact with the metal itself because of the layer of oil on the pan.  That's the theory, but in reality there is always a chance of food coming in contact with metal.  For that reason, we don't recommend long-simmering with highly acidic foods (like tomato sauce). 

Uh-Oh ... Rust

For those who dig out their cast iron only to find that it has rusted while stored away, don't freak out and buy a new set.  The pan can most likely be saved.  First, deal with the rust.  We recommend giving it a wipe with an oiled towel.  If the rust doesn't wipe away, use some kosher salt as an abrasive.  Still there?  Keep working your way up to abrasive sponges and then #00 steel wool as a last resort.

Once the rust is removed, the pan should be dried thoroughly, first with a towel and then with heat.  Once dry, wipe the spot with oil.  Don't worry if the spot still looks dry.  Place the pan back on the stove to heat on low for 10 minutes or so to "cook" the fat into place.  Then, a good re-seasoning will make it good as new.

Now that you know the basics of cast iron care, your camping menu can be upgraded in ways you probably hadn't imagined.  Peanut butter and jelly sandwiches?  Not today.  Another hot dog on a stick?  No thanks.  Bring on the breakfast hash, the roasted chicken, the steak fajitas.  Remember, happy tummies means happy campers.

Continue reading

Regional Event: Spokatopia 2019

There are many reasons to get out an enjoy the outdoors, but this happens to be a favorite of ours.  Spokatopia is the event of the season - a gathering of adventure-minded, outdoor enthusiasts of all levels that lets you test out new gear, new sports, and more.

Spokatopia

The Basics

Spokatopia

July 13 - Opens 9 AM and Closes 10 PM

July 14 - Opens 9 AM and Closes 3 PM

First and foremost, general admission is free.  That's right - FREE.  Check out the link below to see exactly what's included for all general admission attendees.  Some of the clinics, demos, and other activities may have fees associated with them, but there are several passes available through the website or onsite so be sure to go online and select the pass that suits your needs.  We're partial to the Spokatopia Adventure Pass which will allow you to test a Stillwater Outdoors SUP, but then we're a bit biased that way.

Spokatopia - Pass Prices

Spokatopia, Paddling

Paddle Board Race

Sunday, July 14th

Check-in 11:00 AM to 12:00 PM

For those looking for a more casual experience, there is a one mile Recreational Race (Registration is $20 per person) available to all ages and abilities.  For the advanced paddle-boarders out there, the Elite Race is a four-mile gauntlet down and back up river with a $500 prize for the winner in the male and female divisions.  Registration if $50 per person with a maximum board size of 14 feet.

Spokatopia - SUP Cup

Spokatopia Camping

Saturday Night to Sunday Morning

For the first time ever camping will be offered, but sites are extremely limited so sign up early to save your spot.  Because of fire danger, absolutely no fires or personal gas stoves will be allowed!  But don't worry, you won't starve.  There will be food vendors during the day and free light breakfast options on Sunday morning.  For a full list of what will be provided and what you should bring along, check out their website.

Spokatopia - Camping

Trail Run

Sunday, July 14

Free Trail Running Clinic 7:30 AM

Run Starts 8:00 AM

This 5K run is open to all experience levels, so grab your family and friends and get ready to run.  Registration is $20 and includes a bandana and weekend Adventure Pass.  For more information about the run including shuttling options, check out their website.

Spokatopia - Trail Run

Spokatopia, Bikes

Demos

All Weekend

For those considering an upgrade of their current equipment or perhaps looking to break into a new sport, the demos offered at Spokatopia allow you to try before you buy.  They offer one of the largest bike demos in the Inland Northwest with bikes from all of our favorite local shops and brands available.  Please keep in mind that testing all but the REI co-op bikes requires an Expert Bike Pass. Remember to bring your helmet, ID, and other gear to the demos.

If biking isn't your thing, check out the water sport demos which include chances to test out SUPs, kayaks, and canoes on the Spokane River.  We'll be there with our brand of paddle boards, the same styles rented at our sister company, Fun Unlimited.  Please remember to bring your swim suit, towel, and ID to the demos (life jackets will be provided).

Spokatopia - Demos

Spokatopia, Yoga

Clinics

Want to learn how to rappel?  Thinking of taking your SUP game to a new level with SUP Yoga?  Never been in a kayak?  Spokatopia has the answer.  Simply sign up for a clinic and learn the basics while getting to test run a new style of adventure.  If you're interested, check out the website for details on the specific clinics offered, their requirements, and costs.

Spokatopia - Clinics

Spokatopia, Climbing

And Much More

There are far too many events, activities, and vendors to list out in this article.  With family friendly activities, good food, and lots of new friends just waiting to be met, you can't go wrong with a weekend at Spokatopia.  Go online, check out their website, register for a few clinics, and don't forget to stop by and visit us.

See you there!

Continue reading

Camping 101: Sleeping Bags

In our previous article, we took a closer look at the available types of sleeping pads.  Like most things, finding the pad that works best for you may come down to trial and error, but hopefully our post will give you a better idea of where to start.

Sleeping bags are no different.  There are many different styles, designs, insulation levels and types, and extras that are combined in multiple ways, which can make sleeping bag selection seem like a daunting process.  Armed with a clear understanding of how you plan to use it and a little knowledge about the options available, you should have no trouble selecting the ideal sleeping bag for your next adventure.

Insulation

Down Feather

First, let's talk about insulation.  When it comes to sleeping bags, there are two basic types: down and synthetic.  Both offer pros and both have cons, so consider how you plan to use it, where you plan to use it, and how much you want to invest before you buy.  Synthetic sleeping bags usually use polyester as the insulation material whereas down sleeping bags use down (the fluffy feathers that offer insulation to various birds).  When selecting a down sleeping bag, consider buying one that is marked RDS certified (Responsible Down Standard).

Synthetic Pros:

  • Dry Quickly
  • Work When Wet
  • Generally Less Expensive

Synthetic Cons:

  • Heavier Than Down Counterpart
  • Limited Compaction

Down Pros:

  • Lightweight
  • Compacts Well
  • Last Long With Care

Down Cons:

  • Loses Insulation Value When Wet
  • Expensive

Temperature Rating

Before we get into the styles of sleeping bags, another important factor to consider is the temperature rating.  There are three types of ratings: Comfort, Limit, and Extreme.  The Comfort rating is the temperature at which an adult female would be comfortable sleeping in that sleeping bag.  The Limit rating is the temperature at which an adult male would be comfortable sleeping (or a female curled into a fetal position).  The Extreme rating is the temperature at which an adult female would remain alive while using the sleeping bag (but probably at severe risk of hypothermia). 

Most sleeping bags will only put the Limit rating on the label if they use this system at all (so ladies, keep that in mind when making your selection).  Many are simply labeled as Summer, 3 Season, or Winter.  Summer sleeping bags generally work well down to 35° F while 3 Season sleeping bags work well down to 10° F and Winter sleeping bags work under 10° F.  The effectiveness of the sleeping bag varies by condition, of course, so having a proper sleeping pad, good sleepwear, and considering your personal needs may change the rating you require.

Sleeping Bag Shapes

Rectangular Sleeping Bags

Rectangular Sleeping Bags

These are rectangular in shape and provide room to roll around inside the bag.  They typically unzip completely, allowing them to be used as a blanket as well.  Their extra space means less heat retention, however, and they don't usually come with a hood, which means more heat loss near the opening on top.

  • Heavier and less heat retention than other sleeping bags.
  • Low cost and easy to find.
  • Can be zipped together with another rectangular bag to make a larger sleeping bag.
  • Best used for car camping and indoor use.

Mummy Sleeping Bag, Bottom

Mummy Sleeping Bags

These sleeping bags are designed to "cling" to your body.  This tapered shape allows the bag to hold more heat and keep you sleeping comfortably in colder temperatures.  They generally do not unzip the entire way, which means less heat loss at your feet but also makes moving while sleeping difficult and may be less comfortable for some sleepers.

  • Lightweight and easy to compact.
  • Have a hood to minimize heat loss at opening.
  • Easy to find but may be more expensive.
  • Best for general camping, backpacking, kayak/paddle board camping.

Double-Wide Sleeping Bags

These sleeping bags are designed for couples or those who can't sleep without a lot of space.  Keep in mind that any body heat gained by having two people sleep in the same bag may be lost by the loose fit of the sleeping bag.  Some of these bags can be completely unzipped, allowing you to break them down into two separate sleeping bags and making them far more versatile.  Others come with hoods to help prevent some heat loss through the opening.

  • Heavier and bulkier than other sleeping bags.
  • More expensive and more difficult to find.
  • Best for car camping.

There are other types of sleeping bags, of course, including some new and unusual styles like the body-shaped sleeping bag that looks a bit like a snowsuit and the elephant's foot style which only covers your lower half while sleeping.  There are also hybrid designs like the barrel sleeping bag, which isn't as restrictive as a mummy but doesn't have the heat loss as one might experience with a rectangular style bag.  And then there are the sleeping bags designed specifically for men, women, or children which take into account body shape, increased insulation at cold zones (more layers by the woman's feet, for example), and extra features like pillow pockets or sleeves for sleeping pads.

When it comes to getting a good night's sleep, no one can tell you which combination of features is going to be perfect for your unique situation.  Instead, think about your needs, set up a list of priorities, and then consider the environmental conditions.  When in doubt, consider borrowing a sleeping bag from a family member or friend to test it out before purchasing.

Continue reading

Camping 101: Sleeping Pads

What is one of the most important aspects of camping?  What is the one thing that, no matter what, you need to have?

If you answered a good night's sleep, you are right.

I think all of us understand the importance of sleep, not just for our physical well-being but also our mental well-being.  Sleep can set the foundation for an energized, amazing day ... or leave us struggling to work through a mental fog and physical lag that ruins our camping experience.

Thankfully, with a little bit of information and a better understanding of our options, we can set ourselves up for a restful night that leaves us yearning for that next camping experience rather than dreading another night of tossing and turning over what feels like boulders beneath us.

Sleeping Pads

First, we want to address the three main types of sleeping pads available.  Each has their pros and cons and some may be better suited for your style of camping than others.  In our next article, we will focus on sleeping bags, their types, and the pros and cons of each.

Closed-Cell Foam Pads

We will start with the first type of sleeping pad created (besides a bed of branches or leaves) with campers in mind.  These are mats of compressed foam usually less than an inch thick.  They are some of the cheapest and lightest mats available, making them a viable choice for backpackers.

Pros:

  • Cheap, ranging from anywhere from under $10 to around $50.
  • Durable.  Because they are foam, there is no need to worry about them popping or leaking
  • Light, usually under a pound.  For serious gram counters, they can also be cut to size.
  • Good insulation, depending on thickness.

Cons:

  • Bulky.  They must be rolled or folded in a Z formation because they are so stiff.
  • Are not comfortable.  Though many start off with closed-cell foam pads, most campers/backpackers upgrade to one of the other types.

Closed-cell foam sleeping pads, cold weather backpacking

When should you consider them?

The closed-cell foam pads are most common for beginner campers, thru-hikers or winter camping.  While thru-hiking, weight is important, but it must be combined with durability.  You don't have to have to carry patch kits or extra gear in case your pad springs a leak.  Winter campers often use closed-cell foam pads beneath a high-R-value air pad or self-inflating pad for maximum insulation and comfort.

Self-Inflating Pads

These are probably the most popular type of sleeping pad in use today.  It's made by combining open-cell foam insulation and air.  When you open the valve, air rushes into the pad in a vacuum-like process, but keep in mind - it does NOT completely inflate.  They will require a few breaths (somewhere around 10 depending on the type and size) to completely inflate.

Pros:

  • Comfortable and stable thanks to their hybrid design.
  • Durable because of the heavy-duty fabrics used to make them.
  • Variety.  They come in a wide range of products, offering a variety of sizes, insulation values, and costs.
  • More insulation than most closed-cell foam pads and air pads.

Cons:

  • Heavy.  Their hybrid design and thick fabric add up to more pounds.
  • Can be punctured.  Though they are resistant to punctures, it can be done.  Field repairs can be done quickly and easily, however.
  • Can be bulky.  Though they roll up smaller than some closed-cell foam pads, they are still larger than air pads.
  • Take time to pack up.  To deflate, you have to roll them up and slowly force the air out, which can take a while.
  • Cost.  Depending on type, they can be expensive.

Kayak Camping

When should you consider them?

These are great all-around sleeping pads that can be used in most situations.  If you are car camping, winter camping, or camping while biking, paddling, or kayaking, you may want to consider purchasing a self-inflating pad.  Because of the wide variety available, you should be able to find one that suits your needs.  Just consider your priorities while making your selection.  Is weight more important than insulation?  Is comfort number one?  Are you concerned with size (especially if kayaking, paddling, or biking)?

Air Pads

These are the newest type of pads to hit the market and are still changing as manufacturers develop new styles, production methods, and uses.  As the name implies, they are filled only with air, allowing them to compact down to small sizes and add little weight when backpacking.

Pros:

  • Extremely lightweight.  These are the lightest sleeping pads available and usually weigh less than 15 oz.
  • Comfortable.  Some air pads are designed to allow 3 inches of air for comfort.
  • Compact.  Air pads can be rolled down to the size of a water bottle, making them idea for ultra-light backpackers.

Cons:

  • Noisy.  They make a surprising amount of noise while sleeping on them.
  • Fragile.  Punctures are far easier, though repairs can be done in the field.
  • Cost.  These pads generally cost more than other sleeping pads.
  • Take time to inflate.  Even with a hand pump, it's going to take a few minutes to get ready.
  • Deflates with temperatures.  As the night gets colder, the air inside will constrict and deflate the pad a bit.
  • Bouncy.  It's filled only with air which means it isn't as stable as the other two types of sleeping pads.

Backpacking, limited weight and size

When should you consider them?

These pads can be used in almost any situation, but are especially useful for ultra-light backpackers or those with limited space.  If you're not sure whether or not to use an air pad or a self-inflating pad, consider this how your day will go.  After hiking all day through the wilds, you may not want to sit down and spend several minutes blowing up your pad.  Or perhaps you need the extra space in your kayak and decide that the noise is worth it if you can bring your DSLR camera along, in which case an air pad may be the way to go.

Some other things to consider ...

When choosing your sleeping pad, always keep in mind how you plan to use it.  Are you going to be hiking, boating, biking, or near your car?  Are you going to be using in only in the summer months?  Early spring?  Or even winter?  Who is going to be using it?  Only you?  A spouse?  A child?  Will you be bringing a pet?  All of these may influence which pad you choose to purchase.

R-Value

When selecting your sleeping pad, pay close attention to the R-value.  This number represents the insulation value of the pad and may mean the difference between a comfortable night's sleep or a night of shivering.  The R-value is a number between 1 and 10.  The higher the number, the colder temperatures you can sleep in comfortably.  If you're planning to camp throughout winter, find one with an R-value of 5 or higher.  Some brands may not have R-values printed on their pad but instead give the ideal temperatures where you can still sleep comfortably, usually in this format: Min. Temp.: 30° F/ -1° C.

Keep in mind that R-values can be stacked.  If you have a closed-cell foam pad with an R-value of 3 and a self-inflating pad with an R-value of 2.7, the combined R-value becomes approximately 5.7 (approximate because there may be some inefficiency in combining two separate pads that weren't designed to work together).

Be aware, there may be two versions of the same type of pad - usually an insulated version and one that isn't insulated.  The difference between the two is usually only found in the R-value.  Just because a pad is not insulated does not mean it has an R-value of 1, so be sure to check the R-value before purchase.

Baffle

This is the "texture" or pattern of the sleeping pad.  Some have a dimpled appearance, others have horizontal or vertical baffles (like ridges), and others are some combination of the three.  When it comes down to it, baffle type really depends on personal preference and how you sleep.  Back sleepers may prefer one type over stomach sleepers.  People who move around a lot while sleeping may decide one style works better, while people who stay still choose a different style.

Grab a sleeping pad and get camping!

Just like our mattresses at home, the sleeping pads we use while camping will vary depending on our individual needs and preferences.  If you can't borrow a pad to try it out before making a purchase, read reviews online - not only for the pad in question, but also for the company who makes it.  Many backpackers and campers who leave reviews will mention the type of use they bought it for and may include other useful details like time of year, temperature, their size, quirks (like noise or how long to deflate), etc. 
But in the end, trust your instincts.  After all, everyone's needs are a little different when it comes to sleep, especially sleeping in the great outdoors.
Continue reading

#Trashtag: A Social Media Challenge Worth Doing

We've all seen them - social media challenges that are ridiculous, hilarious, and sometimes even downright dangerous.  Fortunately, we've found a challenge that is finally worth doing, one that helps build relationships, better communities, and heals our world.

#Trashtag

This challenge was issued several years ago without much fanfare, but has enjoyed an explosion of popularity worldwide in recent months.  It's a trend we would like to see continue for a long time to come.

Net on Shore

What is it?

The basic idea is simple.  The challenge is to find an area that is filled with litter, take a "before" picture, clean it up, and then post an "after" picture.  A quick search online will show pictures from around the world of truly amazing transformations as garbage-covered beaches are returned to their former sandy selves.

Where should you do it?

Anywhere that's public land and riddled with garbage.  Beaches, walking trails, rivers and lakes, parks, there really is no end to the possibilities.

Who can do it?

Anyone.  Want to tackle it solo?  Go for it, but we believe that many hands make light work so why not get your family, church, club, friends, and/or co-workers involved?  It can be a great way to bond with each other while helping your community and, indeed, the whole world.

If everyone took one day of the year to participate, we could clean thousands if not millions of acres of land and help restore some of the natural beauty to our world.

Beach Clean-up

Some things to remember ...

1. It's always a good idea to let someone know what you're going to do, where you're going, when, and how long you plan to be gone.  Some areas may be remote and there is always a chance to get lost, get hurt, or have other troubles while out.

2. Be careful.  While cleaning garbage, you never know what you may find.  Be careful handling metal and glass which can easily cut skin.  Wear thick protective gloves with good grips (so you don't drop the debris and cut your leg or foot) and make sure to put them in hard containers (not plastic bags).

3. Watch for syringes.  The needles are dangerous, not just because of the blood-borne illnesses they can spread, but because of the drugs that may have been inside of them.  If you see a needle on the ground, never try to re-cap it or snap off the needle.  If you are equipped to pick it up, do so carefully and always keep the needle pointed down and away from you.  Never put syringes in plastic bags or even thin plastic containers like milk jugs.  Always use a heavy plastic, lidded container (like laundry soap or kitty litter containers).  Never allow children to handle syringes.  Always mark the containers as Medical Waste: Sharps and contact your local waste disposal business to find out how to properly dispose of them.

When in doubt, call the police and let them know about the used syringes.  They will take care of them or call someone who can.

4. Though rare, you may come across dead or injured animals.  Do not approach the animal.  Instead, call the local DNR or humane society and let them know where you are and what the situation is and they will handle it.

5. Make sure to bring a first aid kit, just in case.  Anytime you are outdoors, there is a chance for a skinned knee or small cut, but when working with garbage the risk of infection is higher.  Make sure to wash your hands (up to the elbows) thoroughly with water and soap before eating, drinking, and when you are finished.

6. Take proper weather precautions.  In the summer, the sun is going to be a problem.  Make sure to wear proper protective gear, use sunscreen, and have an area where you can escape the hot sun while working.  Drink plenty of water, take frequent breaks, and stop immediately if you feel dizzy, have a headache, or experience any other symptoms of heat stroke/heat exhaustion.

Clean Shore

The next time you're out hiking, walking through a park, or paddle-boarding across a lake, take a moment to look around you.  If you see an area that needs cleaning, why not join a movement that is gaining ground, literally, all around the world? 

Get your gear, grab your friends, and take part in the #Trashtag challenge.


Continue reading

Camping 101: Shelter

With summer just around the corner, we wanted to revisit a favorite subject of ours: camping.  Although we have a beginner's guide on the most basic camping processes, we wanted to take a closer look at the ins and outs of camping.  That's why we're going to have a "Camping Class" - a series of articles about all things camping.

While it may not be for the advanced camper, this guide will hopefully take some of the stress and worry out of the process for those who are just beginning or thinking of beginning a lifetime of camping adventures.  We will discuss shelters, bedding, cooking, tools and safety, and more. 

For those of you experienced campers out there, we'd love to hear your tips, tricks, and go-to camping gear so be sure to comment below.

Tent Camping

Today's Topic:

Shelter

One of the most important aspects of camping to consider is shelter.  Choosing the perfect type of shelter, however, can be a daunting task.  There are thousands of options to choose from - dome tents, RVs, sheltered hammocks, and many more - that range in price and weight.

So how do you choose?

First, you must consider the type of camping you'll be doing.  A ten mile hike before setting up camp will require very different gear than driving to the campsite directly.  If you're going to be carrying your tent with you, weight will be a priority.  If you plan to do winter camping, having a thicker tent may be vital.  Or if you spend most of your time camping in a rainy area (I'm thinking of you Seattle), finding a tent with proper waterproofing is a must.  Using an RV may restrict where you camp as well.

Second, consider how many people will be with you.  A single person or couple can get away with a much smaller tent whereas a family will obviously need adequate space for a large tent.  And be aware, some campgrounds have restrictions on how many tents can be placed at a site, so splitting the group of people among multiple tents may not work without reserving multiple campsites.  As a general rule of thumb for those looking for the casual camping experience, purchase a tent that sleeps at least one person more than will be using it.  This added space allows room for gear and gives adequate space for sleeping.

Third, consider the terrain.  If the ground is extremely rocky or hard, a tent that requires stakes for tension to remain upright may not be the right choice.  If you're out in the woods, hiking and camping as you go, finding a large flat spot to set up the tent may be next to impossible. 

Fourth, consider how much you want to spend.  Camping gear is an investment, so it makes sense to do your research before you buy.  Some businesses allow you to rent tents giving you the chance to try them out before you buy.  If you can't find a place to rent, consider asking friends and family to borrow theirs.  This may give you a better idea of what type of tent will or won't work for your needs.  While going with the most expensive tent isn't necessary, it may be worth it to invest a little extra if you plan to use it a lot or have special needs/requirements (like camping in cold or wet weather).

Now that you have an idea of how you will be using your tent, it's time to dive into the types of tents available.  Although this isn't an exhaustive list, hopefully it will give you an idea of where to start in the search for your perfect camping shelter.

Types of Tents

Ridgeline Tent

Ridgeline Tents

This is a rather retro style of tent that isn't often seen nowadays.  Even so, this style of tent can be useful, especially when dealing with weather issues.  The high pitch doesn't allow for much headroom, but will be sure to shed both snow and water if the weather goes bad.  Ridgeline tents can be difficult to set up well, but when done correctly they are very sturdy.  They typically aren't the greatest for backpacking, however, as they can weigh a lot.

Dome Tent

Dome Tents

These are probably the most common type of tent in use today.  They are relatively easy to put up (even by yourself), don't cost much, don't weigh much, and often pack down to a small size making them a great first tent or a tent to use while hiking.  The larger they are, the less stable they become in high winds and bad weather, so they aren't ideal for large families/groups.

Tunnel Tent

Tunnel Tents

A relative of the dome tents, these tents are made in the same way, with flexible poles that are anchored along the bottom edges and hold the tent up.  This style of tent is great for larger groups, offers decent head room, and is easy to put up.  It is heavy, however, and is best suited for car camping and may have issues with water pooling on top when it rains.

Geodesic Tent

Geodesic Tents

These are like a Dome Tent 2.0.  They use more poles to increase stability and offer better use in winter or bad weather.  They are great for backpacking as they are usually lightweight and durable.  Unfortunately, their advanced design usually means they are more expensive than their dome counterparts and with the added poles, they can be trickier to put up.  Geodesic tents usually only come in smaller sizes, so they may not be suited for family camping.

Cabin Tents

Cabin Tents

These tents usually use an aluminum framework rather than flexible poles.  They are inexpensive and usually made of cheap materials, so these tents are definitely fair-weather camping only.  That said, they are large and can have multiple "rooms" making them great options for larger families and groups.

Hammock Tent

Hammock Tents

These tents are idea for backpacking or off-grid camping where flat, soft, dry ground may not be easy to find.  They are very lightweight, easy to install, pack down well, and offer a comfortable sleep without an added mattress/sleeping pad.  They are for one person per tent, which means that a large group may have difficulty finding enough trees for multiple tents.

Bell Tent

Bell and/or Tipi Tents

These tents come in a range of sizes from 2 to 10 person, making them a suitable option for families.  They can be heavy, require lots of space, and may not be easiest to put up, but in the right conditions, these may be ideal.  They are generally made of canvas, can have a port for a wood stove flue, and are extremely durable.  If you're going to be in one place for a length of time or will be dealing with cold weather extremes, or want the extra room, these may be the tents for you.

This is by no means an exhaustive list of tent types, but hopefully it will give you an idea of where to start in your search for the ideal tent.  The point here is not to buy the trendiest, the flashiest, or the most technical shelter, but to find the one that will work best for you.

Come back soon to find out more about sleeping during your camping adventure!

Continue reading

Looking For New Adventures?

It's spring and here, at least, spring means rain.  While rain can be dreary, don't let it put a damper on your adventure plans for the season.  Here at Stillwater Outdoors, we're eager to get out and explore.

But where?  After a few years in the same location, it can start to feel like you've explored every option, discovered ever treasure, and have nothing new left to do.  Thankfully, we have a few ideas to help you get out and see your corner of the world in a new light.

Hiking using gps on smartphone

Geocaching

Remember your childhood?  Those endless days of summer where reality and fantasy were often indistinguishable as you created an imaginary world of pirates and dragons, space aliens and jungles?  As a kid, I always secretly hoped I'd find pirate treasure while digging in the sand at the beach.  Alas, my dream never came to fruition ... until now.

For those who are unfamiliar with geocaching, here's the basic idea.  There are treasures hidden all around the world - millions of them.  They come in different shapes and sizes and are hidden around you, sometimes in places you pass by every day.  These caches can serve up hours or days of fun as you use the app on your phone or a GPS to hunt them down.  After finding one, add your name to the log book, perhaps add or exchange a treasure (think time capsule treasure rather than gold and jewels treasure), and hide it again for the next hunter to find.

The best part?  These caches can be found all around the world.  Literally.  So whether you're looking for an adventure in your home town, something to do while on vacation, or a reason to explore some exotic locale, geocaching can make you take a closer look at the world around you.

Want to join up?  Create a free geocaching account here:

Geocaching

Hiker on mountaintop

AllTrails

When it comes to hiking, there are almost limitless options that vary in length, remoteness, and difficulty.

So how do you find the right trail for you?

AllTrails is an easy-to-use way to find the right trail for your adventure.  Whether you're looking for dog or kid-friendly trails, a more challenging way to explore your favorite area, or want some first-hand accounts of the trail, view, or difficulty, AllTrails is a great place to look. 

They offer both free and pro accounts (at the time of writing this, the pro account was $2.50/month), so be sure to read the fine print and choose the account that meets your needs. 

To find out more, check out their website:

AllTrails

Playing tourist on stay-cation

Play Tourist ... At Home

This is a great idea for families who want to start in on vacation season without breaking their budget.  Plan for a weekend vacation at home.  Put away your work, tell friends and family (and co-workers) that you'll be on vacation, and do a search on your hometown.  Try searching for "Tourist sites near ..." or "Best places to visit ..." and see what comes up.  You may be surprised by what neat places are lurking in your own backyard.

Another option is to poll your friends and family.  We're betting that they have favorite restaurants, parks, and nearby adventures that you've never tried.  Or check with your local newspaper.  There you can find articles about local events, some of which we're sure you've never experienced.  No matter how you do it, playing tourist can be a fun way to see your hometown in a new light.


Hopefully, this article gave you some ideas to get out explore without breaking your budget or consuming all of your vacation days at work.  Whatever adventure you choose, we at Stillwater Outdoors hope it's one to remember.

Continue reading