Camping 101: First Aid

No one plans to get hurt on a camping trip, but it happens.  Knees get scraped, blisters form on feet, and how many of us remember to reapply sunscreen every 80 minutes?  No matter how careful you are, injuries are bound to happen, which is why we have a few recommendations to help you prepare for those accidents and save your camping trip.

CPR, First Aid

Take a First Aid Course

We know it seems like a hassle, especially with our schedules getting busier and busier, but it's always a good idea to have at least one person on the camping trip take a first aid course.  Even better?  Make it a family affair and have everyone sign up.  Hopefully, you will never have to use any of the skills and know-how that you pick up during the course, but if something happens, you'll be glad that someone close knows exactly what to do.

The American Red Cross offers classes all across the nation.  Visit their website to find a class near you.  They also offer online courses on specific injury first aid like severe bleeding, dog and cat first aid, and basic first aid and CPR courses.

American Red Cross - First Aid Training

Buy a First Aid Kit

First Aid Kit

Did you remember the sleeping bags?  The tent?  The food you prepared ahead of time?  What about the first aid kit?  It's an easy item to forget, especially since it is (hopefully) used so little, but it's not something you want to be without.  There are plenty of good kits available ranging in size and price, so selecting one can be a bit daunting, but even the most basic kit is a good place to start.

We recommend buying a plastic tote with latched handles to use as your first aid container.  Why?  Well, many kits have just enough room for the items they came with and some can be down-right impossible to repack after pulling out some supplies.  The larger, clear tote allows you to add any additional items that you may require including things in larger amounts (like alcohol, iodine, and/or peroxide bottles).

Bandaged Finger, Accident

After you go through the kit, consider what you'll be doing, who will be participating, and where you will be going.  What types of injuries are likely to happen?  Will you be around open flames where burns could be possible?  Is poison ivy, oak, or sumac native to the area?  Do you have enough supplies to deal with multiple injuries? 

If you plan to be exploring out away from your campsite via hiking, for example, consider making smaller, more compact, individual kits that each person can carry.  This is especially true when space and weight is an issue during thru-hiking and other weight-sensitive activities.  Make sure that these individual kits also include any of the person's required medicines in multiple day amounts (just in case they get lost or are injured and can't make it back to camp for a refill). 

Inhaler, Asthma

Remember, in the case of an emergency, call 911!

First Aid Supply List

This is by no means an exhaustive list and every item on here may not be necessary depending on what you plan to do or where you go, but hopefully this list will help give you a better idea of the kinds of items you may need to handle a camping injury.  When in doubt, talk to your first aid trainer or your general practitioner to get a better idea of what should be included in your kit or how to use something properly.

Most of these items can be found at your local pharmacy or supermarket store.

Bandages

  • Adhesive Bandages of various sizes
  • Non-Stick Sterile Gauze Pads of various sizes
  • Wound Closure Strips (Butterfly Bandages)
  • Triangular Bandage (for a sling)
  • Medical Adhesive Tape
  • Moleskin (blisters)
  • Rolled Gauze
  • Hemostatic Gauze (stop bleeding)
  • Liquid Bandage

Creams/Ointments

  • Antiseptic Wipes
  • Antiseptic Hand Cleaner/Soap
  • Antiseptic Solution (like peroxide)
  • Calamine Lotion
  • Hydrocortisone Cream
  • Insect Bite Swaps/Ointment
  • Sunscreen
  • Sunburn Relief Gel

Tools

  • Tweezers (small tipped for slivers)
  • Paramedic Sheers (blunt-tipped)
  • Thermometer
  • 10cc Irrigation Syringe
  • Small Flashlight and Batteries
  • Splint (finger, SAM)
  • Tick Removal Tool
  • Safety Pins
  • Cotton Tipped Swabs
  • Scalpel with #12 or #15 blade

Medications

  • Any Personal Medications
  • Acetaminophen and/or Ibuprofin
  • Lozenges (sore throats)
  • Antihistamines
  • Diarrhea Medication
  • Antacid Tablets
  • Aspirin (heart attack related)
  • Oral Rehydration Salts
  • Glucose (to treat hypoglycemia)
  • Epinephrine Autoinjector

Other

  • Disposable Ice Packs
  • Disposable Non-Latex Gloves (several pairs)
  • Medical Information for Individuals (list allergies, etc)
  • Medical Waste Bags
  • Sharps Box
  • Emergency Heat-Reflecting Blanket
  • Notepad (waterproof) with Pencil and/or Pen
Continue reading

Mud Season Madness

It's officially here - mud season.  For those of you who live in a hotter, drier climate and have never fully experienced all of the slipperiness and squelchiness of mud season, let us explain.  It's that time of year when spring has finally shown its bright, sunny face.  The snow starts to melt, the ground starts to thaw, and the resulting tidal wave of water remains trapped on the surface, unable to penetrate the still mostly-frozen ground.  This is the result ...

mud season

Not a pretty sight, right?  But it gets worse.  For those of us with children and pets, spring time is a constant war against dirt, one that we always lose.

Child in mud     Dog in mud

For the tidy, neat folks of the world, mud season is truly the stuff of nightmares.  Most of us hide out in our homes, counting down the days until the frost fully thaws and the sun and wind do their best to dry out the mud.  Unfortunately, mud season can last for weeks or even months when conditions are right, meaning that we have a long time to wait before doing anything even remotely fun outside.

Or ... maybe not.

That's right.  Today we are challenging all of you mud season phobics to get out of your house, our of your comfort zone, and enjoy all that mud season can offer.  How?  Embrace your inner child and plan a mud season hike.  Don't worry.  It's not as difficult as it sounds.  Here are some tips, tricks, and basic mud season hiking etiquette that will make you excited about mud season every year.

Wet/Muddy Trails are Fragile

That's right.  Some of the most severe and devastating damage to hiking trails happens in spring when the snow melt and thawing frost wreak havoc on maintained paths.  During this time, erosion is the enemy.  Thankfully, there are a few basic tips that will keep you from accelerating any damage Mother Nature has in store.

1.  Be prepared to get dirty.

It's not a matter of if, it's a matter of when.  Hiking in the mud is messy business, but it's also a lot of fun.  Plan ahead with proper gear and supplies and you'll make the entire trip much less stressful.  Wear boots that go above the ankle or consider getting a pair of gaiters.  Bring along towels, dry changes of pants/socks/shoes, and even extra water to give your muddiest gear a rinse before climbing back into your car.  Toss a plastic tote or bag in the back of your car to hold all of the wet gear and save your vehicle's interior.

Walk down the middle of the path

2. Walk down the middle of the path

But there's a puddle?  Or that's where it's the muddiest?  We didn't say this was going to be a nice, neat hike so put on your favorite above-the-ankle water-proof boots and get marching.  Though it may be tempting to walk along the edges of paths where there is less water and mud, that's where most of the erosion happens and trampling those fragile areas only makes matters worse.  Stick to the middle.

3. Step on rocks, logs, or in the water whenever possible.

Okay, so the first two seem obvious.  Rocks and logs provide solid walkways that don't erode the same way the rest of the trail does.  The last, however, may seem counter-intuitive.  Why walk in water?  Especially if it's running water?  Though it may surprise you, running water often provides the most stable ground as the mucky, muddy sediment has already been washed away revealing the sturdy ground beneath it.

Hiking with trekking poles

4. Take baby steps and plan for extra time.

Mud is slippery, perhaps even more slippery than ice.  Because of this, you're going to want to take smaller steps and more time to traverse the same trails you cover in the drier summer months.  If you're really concerned, bring along trekking poles.  They can help keep you upright and can be used to test the depth of both water and mud along the path.  Just be sure to outfit them with rubber tips to help minimize damage to the trails.

boardwalk     Log-step path     Gravel path

5.  Choose your path wisely.

Avoid paths that traverse lowland/wetland areas as these will be far worse in terms of mud.  If you're not sure which trails will be best for an early spring hike, ask.  Some trails are designed to handle the worst every season has to offer and are hard-packed with gravel or may have boardwalks over the worst areas. 

6.  Don't be afraid to turn back.

If you find that the mud is getting deeper or that a stream is literally overflowing thanks to the spring run-off, don't be afraid to turn back.  Streams can easily turn into rivers in the spring and water temperatures are still dangerously low.  It's better not to risk it and head back the way you came.

For many, mud is simply a fact of life, one that you can either embrace or, well, there really isn't any other option.  It's going to happen whether you like it or not so why not have some fun with it?  Think of it this way.  After a nice muddy hike, you, at least, get to return home, shower off the muck, and change into a dry set of clothes.
He, on the other hand, has no escape.

Bear in mud

Continue reading

Snow, Ice, and Cold Water: Winter Water Safety Guide

Snow, Ice, and Cold Water: Winter Water Safety Guide

Summer is ending, fall is fast approaching, and temperatures are already starting to drop ... but don't think that means you have to pack your SUP away for good.  Winter brings unique opportunities to the sport.

As well as some serious dangers.  Never underestimate the cold.  If you plan ahead, prepare, and respect Mother Nature, there is no reason why you can't go and see a world very few have had the pleasure of witnessing ... a winter wonderland seen from the water.

Woman by lake, winter

1.  Know the Water Temperature

We all know that SUPing is swimming, and though few of us plan to end up in the water, it happens.  What most don't realize is that water doesn't have to be that cold to be dangerous.  50 degree (F) water is a lot colder and more deadly than 50 degree air.  Water temperatures between 70 and 60 degrees are considered dangerous.  Water temperatures below 60 degrees are considered very dangerous/immediately life-threatening.  At 60 and below, you may experience total loss of breathing control, inability to control gasping, and hyperventilation.  For more information on the dangers of cold water, check out the National Center for Cold Water Safety at www.coldwatersafety.org

If the water temperature is cold, it doesn't mean you can't SUP.  It does mean that you should take extra precautions to ensure that you can get out of the water quickly and safely if you do fall in.

2.  Watch the Weather

This is important any time you go out on an adventure as no one likes to be caught in torrential rains or unusually blistering heat.  In the winter, however, the danger ramps up.  That slight breeze that cooled you during the summer months now adds a wind-chill factor that could put already cold temperatures below freezing.  And, honestly, who wants to set out on their adventure during a blizzard?  Check the weather days in advance.  Keep checking it as your target date approaches.  And if there are any risks, don't go.  Try again at a later, safer, time.

blizzard by mountains

3.  Make a Float Plan

We mentioned this in our post about general water safety/SUP safety.  Make a detailed plan of your trip - where you will put in, where you will paddle, any potential "safe" areas where you may shore up in case of trouble, when you will leave, when you will return, who is going with you, what you will be wearing, and so on.  Seems like a lot, but getting stranded in the winter is far more dangerous than getting stranded in the summer.  Daylight temperatures in the winter months are cold enough, but when that sun goes down and the temperatures plummet, you don't want to be stranded outside.  Make a plan, give it to someone you trust, and stick to it.

And when choosing your route, consider this:  Can you swim to shore?  If not, you should probably choose a different route.  Hug shorelines and stick to shallows whenever possible to reduce the risk of drowning and/or hypothermia if you end up in the water.

4.  Never Paddle Alone

In the summer, it can be tempting to venture out on your own because there is less risk.  Conditions are ideal and dangers are minimal.  In the winter, however, having someone with may save your life.  The cold makes everything difficult and fine motor skills quickly disappear with gross motor skills following soon after.  Having someone there to help in case of an emergency is vital, so never go out alone.

campfire in snow

5.  Make an Emergency Kit

Whether you plan to be out for an hour or all day, it's a good idea to have a winter-specific emergency kit with you while paddling.  In it, include things you might need if you do end up stranded overnight in the cold.  Matches/a lighter, water, a blanket (to save space consider placing it in a bag that can be compressed and sealed to remove air), chemical heating packets for hands and feet, flashlight, etc.  If you do have to go to shore and can't make it back to your car before nightfall, you're going to need a way to stay warm.  Pack with that in mind.  Consider a safety beacon or flare as well, just in case.

6.  Leash and PDF

In the summer months, it is tempting to SUP without actually wearing your PDF.  On calm, warm water, there is less of a risk of drowning, especially for those who are strong swimmers.  In cold water, however, swimming skill isn't enough to save you.  Wear your PDF at all times.  If you fall into cold water, the shock of it may make it difficult or impossible to swim.  Always keep a leash attached as well.  When the water is cold and swimming is difficult, you don't want your SUP to get out of your reach.

7.  Dry Suit or Wet Suit?

Both can be used, though they work in very different ways and are more useful in different situations.  A wet suit works as you might think - it absorbs water and holds it against your body, allowing your body heat to warm it.  This warm water then becomes an insulating layer between you and the rest of the water.  A dry suit keeps you dry by repelling the water completely and uses the air trapped near your body to keep you warm.  In winter weather, particularly, a dry suit may prove more comfortable.  No matter which you use, keep in mind that layers both under and over can provide extra comfort and safety.  Also make sure that your clothing doesn't restrict your movements, both on the board and if you happen to fall in the water.

Wool Socks

8.  Consider Clothing Carefully

Cotton is a no-no.  Why?  It absorbs and holds water.  Instead, use layers that hold heat, not water, like fleece and/or wool.  Dress in layers as well.  Lightweight layers first, then warming layers (like fleece and wool) and waterproof/repellent layers last.  Hats are important, so make sure to have one.  While in the cold, it's important to keep your hands and feet warm as well, so invest in good gear.  Waterproof boots are nice, though they can be awkward in the water.  Wet suit booties are a great alternative, though they mean your feet will be wet the entire time.  Wear gloves that are waterproof and warm or consider neoprene (wet suit) options.

Two things to keep in mind when dressing for winter paddling:

Dress for the water temperature, not the air temperature

Layer properly for adjusting temperatures throughout the day (so you can remove layers when sweating and add them again when it cools)

8.  Extra Gear to Consider

A dry bag is a great investment for any water enthusiast.  Consider one, or two, for your winter paddling adventure.  One can carry your emergency gear as well as your float plan while the second can be used to store any layers you shed or extra clothing you bring along.  This will ensure they remain dry and ready to be reused later.  A thermos of something hot to drink is always a great idea.  Bring two, one to drink on your way out to the paddle spot and one for after you are finished for the day.  That added heat after a day of cold-weather paddling will definitely be appreciated.  Also consider a change of clothing.  After you return to your car, changing out of anything wet will help raise your body temperature faster and will make the trip home far more comfortable.

mountain lake in winter

Winter offers just as much beauty and fun as summer, as long as you don't underestimate the dangers.  Here at Stillwater Outdoors, we want to encourage you to try something new, something adventurous, while remaining as safe as possible.  Preparation and prevention are key, so the next time you venture out, please take an extra moment to review this guide and, as always, stay safe.

Continue reading

Dangers of Heat Related Injuries

Dangers of Heat Related Injuries

As temperatures climb into the triple digits, many of us run for cover.  Air conditioning becomes more than just a luxury, it can be a lifesaver.  For those who can't remain somewhere cool, heat cramps, heat exhaustion, and heat stroke are very real threats.  Stillwater Outdoors would like to share important information about these heat related injuries as well as ways to prevent them and what to do if you or someone around you is suffering from them.

What are they?

 All three are conditions that are caused by exercising in high heat/high humidity.  They all affect the body in various ways and to various degrees with heat cramps being the mildest reaction and heat stroke being the most severe and potentially life-threatening.

men running outdoors

Heat Cramps

Symptoms:

Painful, involuntary muscle spasms that occur when performing heavy exercise in hot environments

Who is most at risk?

Anyone exercising in high heat can experience heat cramps

Prevention:

Take frequent breaks and drink plenty of water.  Work in the shade if possible.  Avoid working during the hottest part of the day.

First Aid:

Rest in the shade.  Drink plenty of water.  Perform slow, easy stretches or gently massage muscles affected.  Do not return to exercise for several hours after spasms stop.  

fan in sunshine

Heat Exhaustion

Symptoms:

Headache, Nausea, Muscle cramps, Low blood pressure when standing (light-headed), Weak and/or rapid pulse, Dizziness, Fatigue, Heavy sweating, Cool and moist skin with goosebumps even when in heat

Who is most at risk?

The old and young, those taking certain medications that affect your body's ability to stay hydrated or react to heat (like blood pressure medications, allergy medications, and more), overweight/obese, those not used to the heat (those traveling, for instance), those consuming alcohol, and those overdressed

Prevention:

Wear loose and lightweight clothing.  Protect against sunburn (wide-brimmed hat, sunscreen, sunglasses).  Drink plenty of fluids often (not just before or after working).  Avoid working during the hottest part of the day.  Never leave anyone (human or animal) in a parked car for any length of time (temperatures can rise 20 degrees inside a car within 10 minutes).  Go slow until you acclimate to the heat (which can take several weeks).

First Aid:

Loosen clothing.  Drink plenty of water.  Find shade/cool areas to rest.  Bring your body temperature down however possible: dampen towels or cloths and place on skin, take a cool shower, submerge yourself in a lake or other body of water.  If you don't feel better within an hour of starting these measures, seek medical attention immediately.

military, running in high heat

Heat Stroke

This is the most severe and dangerous of heat injuries and requires immediate medical attention!

Symptoms:

High body temperature, Altered mental state or behaviors, Nausea and vomiting, Flushed skin, Rapid breathing, Racing heart rate, Headache (often severe)

Who is most at risk?

The old and young, those exerting themselves in hot weather (participating in sports, military, etc), sudden exposure to extreme heat, those with certain health conditions (like heart or lung disease), those taking certain medications (those affecting blood pressure, treating ADHD, antidepressants, and others), those without air conditioning

Prevention:

Wear loose and lightweight clothing.  Protect against sunburn (wide-brimmed hat, sunscreen, sunglasses).  Drink plenty of fluids often (not just before or after working).  Avoid working during the hottest part of the day.  Never leave anyone (human or animal) in a parked car for any length of time (temperatures can rise 20 degrees inside a car within 10 minutes).  Go slow until you acclimate to the heat (which can take several weeks).

First Aid:

Home treatment isn't enough for heat stroke.  Seek emergency medical attention immediately.  Don't drink any fluids while awaiting medical help.  Take measures to cool down your body (cool damp towels, find shade/air conditioning).  Heat stroke can cause damage to vital organs and even death.  When in doubt, don't risk it - seek emergency help immediately.

Please be careful and take the proper steps to help prevent heat related injuries this summer.  Save and share our infographic to help spread the word and make everyone's summer safer.

Heat Injury infographic, symptoms and prevention

Continue reading

Whitewater SUPing: The Next Adventure

Whitewater SUPing: The Next Adventure

You've tried and subsequently fell in love with stand-up paddle boards ... but flat water just doesn't hold the same appeal it once did.  Sound familiar?  You're not alone.  Many who learn the sport on flat water find themselves wondering what's next?

Stillwater Outdoors has the answer or, rather, we know the answer.  Whitewater SUPing.  That's right.  It's no longer reserved for kayaks and rafts and is quickly becoming a nation-wide competitive event.

Now, we don't suggest that you dive into competition immediately.  Like any sport, there is a fair bit of learning and practice involved.  Where whitewater is concerned, this training stage is vital as it can, quite literally, save your life.  Here are a few other tips for those looking to try a new, exciting use of their SUP.

1.  Gear Up

If you already have an SUP, you should already have the basic gear needed for being on the water: PFD, whistle, paddle, leash, and SUP.  Whitewater SUPing requires a few additional pieces of equipment.  First of all, inspect your SUP.  There are many different types designed for many different uses.  For whitewater rafting, you want a stable, durable board (inflatable boards work well) that has considerable rake (an upturning of both the front and back) to ensure you remain on top of the waves instead of being pulled under them.  If you don't have much rake on your SUP, adjust your placement on the board by standing farther back to keep the nose of the board up while riding the rapids.

Whitewater Helmets

Consider buying a helmet, knee and elbow pads, and potentially a different PFD.  The ACA (American Canoe Association) recommends an inherently buoyant lifejacket for all whitewater rafting.  You may need a new leash as well (if you choose to use one).  For whitewater SUPing, the ACA recommends that you wear a leash at waist level, accessible with both hands, and it must have a quick release feature.  For more information on the basic equipment needed for different types of SUP uses, check out this video released by the ACA:

SUP Leashes and Lifejackets

2.  Consider Taking a Class

For those who have no whitewater experience, we highly recommend taking a class with a certified whitewater instructor.  The ACA offers a list of classes offered, including classes for those wishing to become certified as an instructor.  Check it out here:

American Canoe Association: Whitewater Classes

Whitewater Rafter Overboard

Whitewater SUPing is swimming.  You will fall off.  You will have to swim.  This is yet another reason why taking a class is important.  Swimming in a rapids isn't the same as swimming in a lake or even a calm, flat river.  There are unseen obstacles, plenty of places to get caught, and the water is volatile making it difficult to tell which way is up in some situations.  Take the time to become a better swimmer before attempting any serious rapids.  The more comfortable you are in the water, the less likely you will be to panic and the more likely you will be to walk away unscathed.

3.  Start Small

Once you feel comfortable understanding the proper way to handle and remain safe on whitewater rapids, the next step is to try it out.  We recommend starting small with a class I or class II rapids.  Though it may be easier, don't always practice on the same rapids.  Exposure to new situations, different currents, and new obstacles will help you grow as a paddler and will help you be better prepared to move up to the next class of rapids.

Couple in Canoe Going Down Rapids

4.  River Etiquette

Like almost everything in life, there are certain rules that should be followed while on the river.  Canoe & Kayak offers a wonderful blog post about river etiquette that outlines the basic rules of the river.  One of the most important?  Those upstream on the river have the right of way.  Just like when you cross the road, always look before entering the river to be sure you don't cut off another river user and create a potentially dangerous situation.  You can find Canoe & Kayak's complete list of river etiquette here:

Canoe & Kayak: River Rules

5.  Pick Your Rapids

Now that you have a better understanding of what you need to get started on your SUP whitewater adventure, you probably need to find the perfect location.  American Whitewater offers an interactive map that shows you the class of rapids, its current water level, and when the information was last updated.  While there, consider offering your support by becoming a member or by donating (money or time) to help preserve our river systems.

American Whitewater Map

Kayak in Rapids

This is just a basic outline of some of the factors to consider before starting whitewater SUPing.  It is a challenging, fun way to get more out of your SUP experience.  Just remember to be careful, plan ahead, and, as always, have fun.

Continue reading

SUP Camping: A New Way to Explore

SUP Camping: A New Way to Explore

There is something thrilling about loading your gear into a backpack, driving out into the wilderness, and then leaving everything behind as you explore a world very few are lucky enough to see.  The challenge isn't just in the terrain, but in the very act itself.  When you are limited to a backpack and are faced with surviving in the wilderness ... what do you bring?

But backpacking has even more limitations, especially when it comes to water.  That's why we are huge fans of SUP camping.  A relatively new activity, SUP camping brings a few notable advantages your to next camping adventure while still providing the challenges you crave.

Hiking boots and backpack

There's more space than a backpack ... but not much.  While SUP camping, you have two main loading areas: one at the front of the SUP and one at the rear.  What you load and where you load it depends on what you plan to plan to do, where you plan to go, and how long you plan to be gone.

Consider your board.  There are many different types of SUPs, and not all are created equal when SUP camping.  Typically, touring or all-purpose boards are best.  They are wider, longer, and generally more stable than other boards.  You also want a board with adequate places to anchor your gear.  Bungees in the front and back are ideal.

SUPing is about balance, so be sure to balance the weight along the center line of the board.  Weight distribution back-to-front is important as well.  In most cases, you will want equal weight in the front and back.  If you are planning to go through any whitewater, considering packing more of the weight up front.

First Aid Kit

Create a day/ditch bag.  This is the bag you plan to grab if you need to ditch your SUP for some reason (whether you're going to do a little exploring on land or you tip, your gear gets free, and you have to make a quick decision before it floats away).  In it, store what you need to survive - water purification system, matches, first aid, some food, your cell phone and money, and so on.

Do a dry run.  This may seem like overkill, but it's better to figure out that you have too much gear and not enough board in your backyard than at your drop-in site.  If possible, test it out on the water.  This allows you to adjust weight distribution to be sure you can balance properly on the board.  It also gives you a chance to feel how the board handles on the water with your gear attached.

Weight Scale, Light and Heavy

Think light.  Don't be fooled.  SUP camping isn't just about minimal gear, it's also about lightweight gear.  All boards have a maximum weight with the larger boards topping out around 300 pounds.  After you consider your weight, the weight of the dry bags, the weight of any food and water you need to bring, sleeping gear, cooking gear, clothing, first aid gear ... you see where I'm going with this.  After packing, weigh your dry bags to get a better idea of what the combined weight will be to make sure that you don't overload your board.

And, of course, follow all of your water safety rules.  That includes bringing safety gear (compass, maps, GPS, etc.) as well as creating a float plan to leave with an emergency contact.  Make sure to follow any laws/rules associated with the body of water you are traversing as well as any camping regulations that apply to your planned rest stops.


Continue reading

A Beginner's Guide to Camping

A Beginner's Guide to Camping

Most outdoor enthusiasts understand the allure of camping.  They appreciate the solitude, the chance to connect with nature, and power of unplugging from technology.  There is a certain primal satisfaction to be gained from disconnecting from the rest of the world, facing all that Mother Nature has to offer, and returning again a bit dirtier and maybe with a few more bumps and bruises.  They've gone off-grid, challenged the most wild and untamed parts of this world, and pushed themselves to go farther, climb higher, and stay longer.

This article is not for them.

For those of us who are relatively new to the idea of off-grid (no campgrounds and no amenities) camping, the idea is ... well, fairly daunting.  How do you get water?  Where do you go?  What do you bring?

Woman overlooking lake and mountains

Where should I go?

That's completely up to you, and by that I mean it's up to your skill level, location, preferences, and so on.  When choosing your destination, consider these questions:

  • How do you plan to get there?  Hiking?  Biking?  Boating?
  • What skills/limits do you have?  Mountain climbing?  White water rapids?  A mile walk?  Ten miles?
  • What temperature/weather conditions are you willing to handle?  Hot?  Cold?  Rain?
  • Who is coming with you and what are their capabilities/limits?
  • How long do you want to be gone?
  • How much are you willing to spend on food, permits, and any additional/specialized gear?

Answering these questions will help narrow down your list of possible destinations.  My go-to off-grid destinations are almost always National Parks/forests which cover thousands of acres, encompass varied terrains for all skill levels, and can be found in just about every climate.  Check with these websites for more information (including campground information for those who want to use them):

US National Forest Campground Guide

Government Recreation Site

US Forest Service

Tents on mountain overlooking lake

What should I bring?

There are too many variables to come up with a complete list, but this should provide you with a good start for your next camping expedition.

Shelter

Whether that means a tent, a camping hammock, or a rain fly stretched out between two trees, you are going to need somewhere to sleep.  Other things to consider when choosing what type of shelter to bring include weather (temperature and precipitation), bugs (mosquitoes and sleep don't mix), and even wildlife (it's never fun to wake up with a snake in your sleeping bag).  If you are planning to carry your gear in, lightweight shelters are a must.  Also consider bringing some sort of compact, lightweight sleeping mat.  Rocks and tree roots start to feel like boulders and logs after a few minutes of sleeping on them.

Fish cooking on campfire

Food

If you are planning to fish or hunt (check for licensing requirements and seasons before doing either) for your food, that's fine, but what if you don't catch anything?  The fish don't care how hungry you are - if they don't want to bite, they're not going to bite.  How much room do you have for food?  How long are you going to be gone?  How strenuous will your daily activity be?  Answering these questions will help you determine how much and what to bring for meals.  Also consider how the meals will be prepared.  Are you going to have to cook?  How are you going to do it?  Cooking gear adds a lot of weight and takes up space, so consider your options carefully.

Water

How do you plan to get water?  Bringing it along may not be an issue if you can drive directly to where you plan to camp, but in many situations that isn't possible.  Water is heavy, bulky, and necessary.  If you are planning to use water you find (even water from campground spigots), it needs to be treated first.  There are many options including chemical tablets (remember to wait the recommended time before drinking/adding flavoring), water filtration systems, and boiling the water (for at least five minutes and make sure to cool before drinking).

Compass and map

Safety Gear

This includes basic first aid equipment, compass/GPS, a knife or multi-tool, maps (digital and paper), a cell phone or other communication device, and so on.  Waterproof matches and/or a lighter are always a good idea, even if you're not camping near water - just be sure to check for any burn restrictions in your area.  Again, where and when you go will help determine which items are considered necessary.

Clothing

Consider the climate, terrain, and what you'll be doing.  How much room do you have?  What are potential weather concerns?  How long will you be gone?  Dressing in layers allows you to adjust for changes in temperature throughout the day and clothing that dries quickly is always good to have.  Don't forget to bring a change of clothes to leave in your car for the trip home - especially if your route out involves water travel.

Hiker, mountain gear

Camping Plan

It is always a good idea to have an emergency contact with all of your information including where you will be staying, the route you will take to get in/out, any day trips (hiking, biking, boating) that you plan to make, and when you'll be leaving/returning.  Make sure to bring a copy with you and include any safety phone numbers (forest service, local police, etc) on it.  When the trip is over and you've returned home, make sure to notify your emergency contact that you made it back.

Stillwater Outdoors invites you to join our email list to get free information on camping, water sports and safety, and more.

Continue reading

Boat Launch Etiquette: A Helpful Guide

Boat Launch Etiquette: A Helpful Guide

Like thousands of others this Memorial weekend, my husband and I ventured out to a local lake to enjoy a bit of boating.  If you've ever gone to a boat launch during a holiday, you probably understand how stressful and chaotic it can be.  Long lines, impatient children, and something always seems to go wrong.  We were lucky.  We got to the lake early enough to avoid the big crowds at the ramp and were docked and settled before things got busy.

Those who came later in the day, however, weren't so lucky.  We watched, completely baffled, as a man spent nearly 30 minutes at the launch, blocking one of the ramps, as he tried to secure his kayak on top of his vehicle.  For those of you who may not know, kayaks can be carried and don't require trailers.  Why then was he blocking a ramp and preventing others from launching their boats?  We have no idea.  Or the man who backed his boat into the water only to realize that he had yet to remove any of the straps securing it to the trailer... straps that were now several feet under the water.  While his wife and children waited, he had to pull the boat out of the water, remove the straps, and back it down the ramp once more.

Boat launches don't have to be stressful.  They certainly don't have to turn us into monsters rampaging down the dock or completely ruin our vacations.  If you keep a few friendly reminders handy the next time you visit the boat launch, you will soon understand how a little planning and a quick checklist are all you need to make your day on the water start out right.

Note: Although I worked at a company where I was required to launch various watercraft, I am by no means an expert.  Please use this only as a basic guide and consult any and all manuals associated with your specific boat and trailer before launching.  This is not an exhaustive list of all the steps required to launch a boat properly and safely.

Boat Launch Parking Area for Boat Prep

Prep Area

Upon entering the boat launch, do not go directly to the launch.  Don't do it.  I don't care if the kids are screaming in the back seat or if there's no one there when you arrive.  Your first stop must be the prep area.  Some launches have designated lanes for this.  Others don't.  If your boat launch doesn't, go to a parking spot instead.  Once there, use this checklist to help make sure the basic preparations are done before you approach the water.

  1. Insert/tighten your drain plug(s)
  2. Remove any straps from the rear of the boat (keep the front secured until the boat is in the water)
  3. Unplug your trailer lights if not using waterproof, LED lights (this helps prevent bulbs from cracking during the temperature change)
  4. Check for safety gear including PFDs, whistles, oars, fire extinguishers, lights, buoys, flags, and so on
  5. Load any optional gear including water bottles, food, towels, and so on
  6. Remove anything you don't want to keep in the boat (things stored there for travel, for instance)
  7. Secure a rope to the boat to keep hold of during the launch
  8. Pay any parking or use fees

The basic idea here is to get as much as you can done before you get to the water.  Then, when you approach the launch, you can be on and off the ramp in a matter of minutes.

Boat Launch, ramp

Boat Launch

Always inspect the boat launch before you approach.  Look for debris in the water - logs and branches can drift into the shallows, broken glass, metal, and uneven concrete slabs can cause problems.  Also look for the slope of the launch.  A gradual slope means you'll have to drive the boat farther in before it floats.  A steeper slope means you'll need to back up less, but will prove harder to remove the boat later.  If you have someone with you, have them wait on the dock, within sight, as you approach.  They can tell you when to stop and can hold the rope when the boat is launched.  If you are alone, be prepared to tie your boat to the dock.  Make sure that whatever you tie the boat to is well-secured.

Personal Watercraft (PWC) secured to a dock

Return to your vehicle and make your final approach to the launch.  For those who launch boats often, backing up becomes second nature.  For those of you who may not do this very often or have never done it, practice.  Practice at home.  Practice a lot.  It seems ridiculous, but backing up a trailer is difficult, especially when the boat is very large or very small.  Visibility is limited and movements are counter-intuitive.  It's better to practice in your driveway or on a dirt road somewhere and take fifty times to get it right than to show up at the boat launch and spend the same fifty times trying while ten others wait in line behind you.

So please, for everyone's sake, practice.

Docking Bays at Boat Launch

Unless the dock is very long or has several docking bays to which you can secure your boat for any length of time, the name of the game here is speed.  Please don't sit at the dock for a long period of time while you arrange things or do more equipment prep while at the launch.  Those things were supposed to be done in the prep area.  Once the boat is in the water and you have parked your vehicle, it's common courtesy to try to return to the boat and cast off as soon as possible.  There are others waiting to use the dock (both outgoing and incoming).  Try to make any final arrangements, like loading people into the boat, as quickly and safely as possible and be on your way.

Launching/Retrieving Boat

On the Return

When your day is done and you're returning to the launch, do everything in reverse order.  People were the last in, now they are the first out.  Tie off or have someone hold the boat while you retrieve the vehicle.  Approach the launch and park.  Pull the boat into place with ropes.  Never power load any watercraft!  I've seen boaters try to drive their boats onto the trailer only to have it end horribly wrong.  It's probably illegal (and if it isn't, it should be) and it can seriously damage your boat.  I've seen PWCs overshoot and hit the vehicle.  I've seen boats run into trailers that weren't deep enough and gouge out the bow.  Be safe, be careful, and use ropes to pull the boat into place.

Once it is secured at the front of the trailer, get back into the vehicle and drive up the launch just far enough for you to do a vegetation check.  This means getting out again, or having someone else do it for you, to check the trailer and boat for any plant or animal matter that may have decided to go along for the ride.  Remove the debris and then proceed to the prep area or parking lot.  Once there, you can go through the checklist again.  Make sure that all the necessary straps are in place and tight, test your lights to be sure they are working properly, remove the drain plug, and then remove or secure any gear in the boat.

This is not an exhaustive list by any means.  Every trailer and boat combination likely has different quirks or steps that may be required.  The more familiar you are with your boat, trailer, and the launch will determine how smoothly and swiftly things go.  Please use this as a guide only and add any steps that your situation requires to launch safely.


Continue reading

A Friendly Reminder: Water Safety Do's and Don'ts

A Friendly Reminder: Water Safety Do's and Don'ts

Though I lived within a mile of a lake while growing up and visited it several times a week during the summer, I still remember the anticipation, the excitement, and the overwhelming desire to run out of the car and down to the water as soon as it got within sight.  It didn't seem to matter how many times I went - my reaction was always the same.  As a kid, my top concern was fun.  Water was fun.  Splashing was fun.  Swimming was fun.

Waiting was not.  Sunscreen was not.  Rules were definitely not.

Now that I'm older, hopefully a little wiser, and with a child of my own, I've come to appreciate some of those rules my parents drilled into my head at such a young age.  With that thought in mind, I'd like to share some of those rules with you and your family with the hope that they will provide some ease of mind and make your summers a bit safer and a lot more fun.

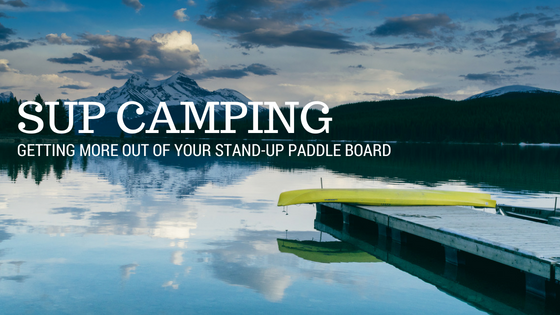
Please save and share the infographic on basic water safety with friends and family.  Although it was originally designed for SUPs, it applies to most watercraft.

Water Safety Do's and Don'ts

Travel With a Buddy

This one seems obvious, but I'm always surprised by how often it's ignored.  Water travel isn't like a car travel.  If something breaks and you get stuck, you can always call a tow-truck while on the road.  And if you end up having to spend the night?  At least you're warm, dry, and in the relative safety of a car.

On the water, things are far more dangerous.  Some lakes can span many miles, rivers go even farther, and depending on the time of year, time and day, and particular water you happen to be on, there is a chance that you won't be able to flag anyone down for help.  If you are injured out on the water, you may not have time to wait for someone to find and help you.

Family on an SUP at sunset

Having a buddy with you can save your life, literally, so don't risk it if at all possible.

And if you do have to go it alone?  Always leave your information with a friend.  Give them a detailed map of the water you're going to be traveling including marked areas for every stop you plan to make, and then don't improvise once you're out there.  List the time you plan to leave, the time you plan to return, and visual cues (the color of your clothes, vest, watercraft, and so on) for rescue crews should they be called.

Bring a Map, GPS, and Compass

These are useful whether alone or with a group as it is easy to get turned around while out on the water.  There are no road signs and in some cases there aren't even many landmarks by which to orient yourself.  Having a map and compass can mean the difference between getting off the water and into town before nightfall ... or eventually wandering into town sometime after 2 AM only to realize it's the wrong town.

Aerial View of River System

Although most phones have GPS capabilities, don't rely on it to always work or be accurate.  Many lakes are in remote areas and reception can be spotty at best.  Plus, if you've been using it to take pictures during your trip, the battery might not have much power left.  Bring a separate GPS unit if at all possible and make sure it's charged before heading out.

Watch for Changes in the Water/Weather Conditions

This is especially important for those of you using non-motorized boats.  Though this may be hard to do depending on your water access, it is better to row against the wind at the start of the trip when you have plenty of energy to spend.  Then, on the return, when your muscles are already starting to ache and you're feeling the burn, the wind will be at your back and will help you get to your drop-in site rather than fight against you.

As for the weather?  The dark clouds in the distance may seem a long ways off, but a quick change in the wind and they'll be dumping rain on your head before you know it.  Always watch the skies for any sign of impending storm.  If it looks questionable, don't risk it.  Shorten your trip and remain within easy rowing distance of your drop-in site.  It you see any lightning or hear thunder, get off the water immediately.  Go straight for shore - regardless of if it's your drop-in site or not.  A bit of trespassing is nothing compared to electrocution and most land owners will understand given the circumstances.

Lightning Strike on Open Water

Remember, water doesn't attract lightning, but it is a great conductor.  A lightning strike doesn't have to be a direct hit to kill you while on the water.  More importantly, while out on the very flat, very open water, you will most likely be the tallest thing around and will serve as a lightning rod.

Don't Lose Track of Time

This is important for many reasons.  One, watercraft are required to have lights after a certain time each evening to be sure they can be seen by other watercraft.  If you're busy taking pictures and exploring and forget the time, you may find yourself in a dangerous situation, especially if you're using a non-motorized boat with no built-in lights.

Two, things look different in the dark.  It is far harder to find your way home when the landmarks on the shore are no longer visible. 

Three, if you're out alone, losing track of time could cue your friend to call for help.  They may believe you to be hurt or lost when, in reality, you fell asleep in a sheltered bay after a nice afternoon swim.

Bring Your Dog and Give Them a PFD

Dog with PFD, dog life-vest

Many dogs can swim and love being out on the water.  Some dogs can even swim for great distances.  But it may be dangerous to assume that just because your dog can swim out thirty feet to collect the stick you threw that he can swim the two hundred yards back to shore after your boat capsizes.  Even if he can, many dogs won't swim for safety if their family remains behind and having them tread water waiting for you could prove deadly.  If you're taking any pet on the water and they aren't a goldfish or the family parrot, get them a personal flotation device built to support their weight and size in the water.

Remember Your Car Keys (and Any Other Important Items)

This may seem obvious, but many people leave them behind - usually locking them inside their car.  Sound familiar?  Before you go, check for your keys, wallet, and phone.  It's always a good idea to have identification and a bit of money on hand, just in case.  Worried about them getting wet?  Invest in a good dry-bag.  I suggest getting one that's brightly colored to make it easier to see on the water or from a distance.

Stillwater Outdoors Dry Bag, light blue/black

Dry-Bag by Stillwater Outdoors

Watch for Other Boats

It's always a good idea to have at least one person in every group take a boater's safety course before going out on the water.  In some states, it's required, so be sure to check with the local laws before you head out.  Even if it isn't, the course will provide you with vital information that could save your life while out on the water.

For those of you using non-motorized craft like a SUP, canoe, or kayak, the general rule of thumb is to avoid motorized boats as best you can.  They are moving faster, are heavier, and will do a lot of damage if they hit you.  Yes, they are supposed to be watching for other boaters.  Yes, like pedestrians, you do have the right of way in many cases.  But none of that matters if something happens to distract them and they drive straight into you.

While boating, do everything you can to make yourself easier to see.  Brightly colored clothes, flags that wave overhead, even lights can help to make collision less likely.  And if you decide to jump into the water for a swim?  Always remain close to your boat, never do so in high traffic areas, and remain vigilant.

Don't Get Too Close to Wildlife

Although seeing that massive turtle sunning itself on a log would make for a great photo, that yawn isn't really a yawn.  And that hissing sound?  The turtle you're trying to get a selfie with isn't pleased.  More importantly, even something as seemingly benevolent as a turtle can be dangerous.  Snapping turtles' jaws are meant to cut and combined with their jaw strength can severe fingers and toes.

Snapping turtle on land

So if you happen to see a little critter frolicking playfully in the water as you row past, take a picture ... but do so at a safe, responsible distance.  Remember that wildlife, as the name implies, is wild and when you're out on the water, you're in their domain.  Be respectful.  Even turtles deserve a little personal space.

Tie Off Your Boat

After several hours of boating, a planned lunch break may seem like a good idea.  You pull your boat onto the beach, empty out your snacks on a beach towel, and settle in for a quick meal.  And after that?  What's better than a quick nap or bit of sun-bathing (with adequate sunblock to protect against cancer of course)?  So, twenty minutes later, you lift your head, scan the beach, smile at the duck paddling through the reeds, and then feel your stomach drop as you realize that's your boat floating across the lake.

Although lakes and rivers don't experience tides in the same way the oceans do, there are plenty of other factors to consider - the biggest one being the wind.  A quick change in its force or direction could be disastrous for your trip.  So the next time you stop for lunch, tie your boat to something permanent - a tree, a massive boulder, a heavy anchor.  Anything that will hold it in place should the wind change direction.

From all of us at Stillwater Outdoors,

Have fun and be safe.

Continue reading