Camping 101: Sleeping Bags

In our previous article, we took a closer look at the available types of sleeping pads.  Like most things, finding the pad that works best for you may come down to trial and error, but hopefully our post will give you a better idea of where to start.

Sleeping bags are no different.  There are many different styles, designs, insulation levels and types, and extras that are combined in multiple ways, which can make sleeping bag selection seem like a daunting process.  Armed with a clear understanding of how you plan to use it and a little knowledge about the options available, you should have no trouble selecting the ideal sleeping bag for your next adventure.

Insulation

Down Feather

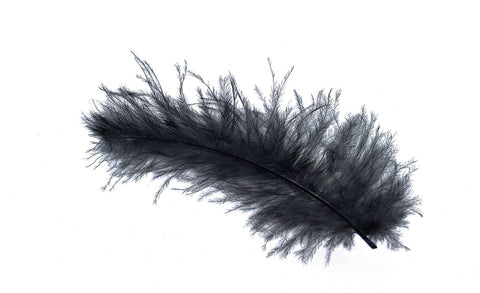
First, let's talk about insulation.  When it comes to sleeping bags, there are two basic types: down and synthetic.  Both offer pros and both have cons, so consider how you plan to use it, where you plan to use it, and how much you want to invest before you buy.  Synthetic sleeping bags usually use polyester as the insulation material whereas down sleeping bags use down (the fluffy feathers that offer insulation to various birds).  When selecting a down sleeping bag, consider buying one that is marked RDS certified (Responsible Down Standard).

Synthetic Pros:

  • Dry Quickly
  • Work When Wet
  • Generally Less Expensive

Synthetic Cons:

  • Heavier Than Down Counterpart
  • Limited Compaction

Down Pros:

  • Lightweight
  • Compacts Well
  • Last Long With Care

Down Cons:

  • Loses Insulation Value When Wet
  • Expensive

Temperature Rating

Before we get into the styles of sleeping bags, another important factor to consider is the temperature rating.  There are three types of ratings: Comfort, Limit, and Extreme.  The Comfort rating is the temperature at which an adult female would be comfortable sleeping in that sleeping bag.  The Limit rating is the temperature at which an adult male would be comfortable sleeping (or a female curled into a fetal position).  The Extreme rating is the temperature at which an adult female would remain alive while using the sleeping bag (but probably at severe risk of hypothermia). 

Most sleeping bags will only put the Limit rating on the label if they use this system at all (so ladies, keep that in mind when making your selection).  Many are simply labeled as Summer, 3 Season, or Winter.  Summer sleeping bags generally work well down to 35° F while 3 Season sleeping bags work well down to 10° F and Winter sleeping bags work under 10° F.  The effectiveness of the sleeping bag varies by condition, of course, so having a proper sleeping pad, good sleepwear, and considering your personal needs may change the rating you require.

Sleeping Bag Shapes

Rectangular Sleeping Bags

Rectangular Sleeping Bags

These are rectangular in shape and provide room to roll around inside the bag.  They typically unzip completely, allowing them to be used as a blanket as well.  Their extra space means less heat retention, however, and they don't usually come with a hood, which means more heat loss near the opening on top.

  • Heavier and less heat retention than other sleeping bags.
  • Low cost and easy to find.
  • Can be zipped together with another rectangular bag to make a larger sleeping bag.
  • Best used for car camping and indoor use.
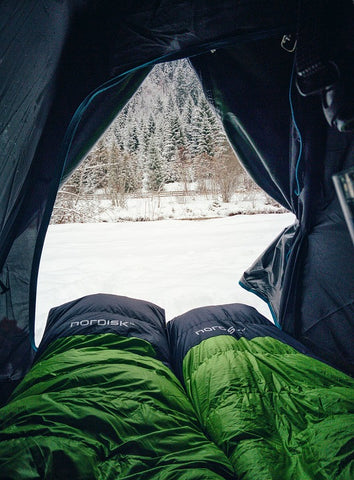
Mummy Sleeping Bag, Bottom

Mummy Sleeping Bags

These sleeping bags are designed to "cling" to your body.  This tapered shape allows the bag to hold more heat and keep you sleeping comfortably in colder temperatures.  They generally do not unzip the entire way, which means less heat loss at your feet but also makes moving while sleeping difficult and may be less comfortable for some sleepers.

  • Lightweight and easy to compact.
  • Have a hood to minimize heat loss at opening.
  • Easy to find but may be more expensive.
  • Best for general camping, backpacking, kayak/paddle board camping.

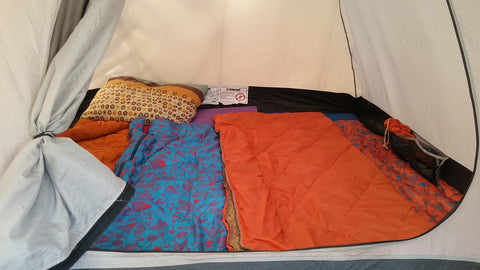
Double-Wide Sleeping Bags

These sleeping bags are designed for couples or those who can't sleep without a lot of space.  Keep in mind that any body heat gained by having two people sleep in the same bag may be lost by the loose fit of the sleeping bag.  Some of these bags can be completely unzipped, allowing you to break them down into two separate sleeping bags and making them far more versatile.  Others come with hoods to help prevent some heat loss through the opening.

  • Heavier and bulkier than other sleeping bags.
  • More expensive and more difficult to find.
  • Best for car camping.

There are other types of sleeping bags, of course, including some new and unusual styles like the body-shaped sleeping bag that looks a bit like a snowsuit and the elephant's foot style which only covers your lower half while sleeping.  There are also hybrid designs like the barrel sleeping bag, which isn't as restrictive as a mummy but doesn't have the heat loss as one might experience with a rectangular style bag.  And then there are the sleeping bags designed specifically for men, women, or children which take into account body shape, increased insulation at cold zones (more layers by the woman's feet, for example), and extra features like pillow pockets or sleeves for sleeping pads.

When it comes to getting a good night's sleep, no one can tell you which combination of features is going to be perfect for your unique situation.  Instead, think about your needs, set up a list of priorities, and then consider the environmental conditions.  When in doubt, consider borrowing a sleeping bag from a family member or friend to test it out before purchasing.

Continue reading

Camping 101: Sleeping Pads

What is one of the most important aspects of camping?  What is the one thing that, no matter what, you need to have?

If you answered a good night's sleep, you are right.

I think all of us understand the importance of sleep, not just for our physical well-being but also our mental well-being.  Sleep can set the foundation for an energized, amazing day ... or leave us struggling to work through a mental fog and physical lag that ruins our camping experience.

Thankfully, with a little bit of information and a better understanding of our options, we can set ourselves up for a restful night that leaves us yearning for that next camping experience rather than dreading another night of tossing and turning over what feels like boulders beneath us.

Sleeping Pads

First, we want to address the three main types of sleeping pads available.  Each has their pros and cons and some may be better suited for your style of camping than others.  In our next article, we will focus on sleeping bags, their types, and the pros and cons of each.

Closed-Cell Foam Pads

We will start with the first type of sleeping pad created (besides a bed of branches or leaves) with campers in mind.  These are mats of compressed foam usually less than an inch thick.  They are some of the cheapest and lightest mats available, making them a viable choice for backpackers.

Pros:

  • Cheap, ranging from anywhere from under $10 to around $50.
  • Durable.  Because they are foam, there is no need to worry about them popping or leaking
  • Light, usually under a pound.  For serious gram counters, they can also be cut to size.
  • Good insulation, depending on thickness.

Cons:

  • Bulky.  They must be rolled or folded in a Z formation because they are so stiff.
  • Are not comfortable.  Though many start off with closed-cell foam pads, most campers/backpackers upgrade to one of the other types.

Closed-cell foam sleeping pads, cold weather backpacking

When should you consider them?

The closed-cell foam pads are most common for beginner campers, thru-hikers or winter camping.  While thru-hiking, weight is important, but it must be combined with durability.  You don't have to have to carry patch kits or extra gear in case your pad springs a leak.  Winter campers often use closed-cell foam pads beneath a high-R-value air pad or self-inflating pad for maximum insulation and comfort.

Self-Inflating Pads

These are probably the most popular type of sleeping pad in use today.  It's made by combining open-cell foam insulation and air.  When you open the valve, air rushes into the pad in a vacuum-like process, but keep in mind - it does NOT completely inflate.  They will require a few breaths (somewhere around 10 depending on the type and size) to completely inflate.

Pros:

  • Comfortable and stable thanks to their hybrid design.
  • Durable because of the heavy-duty fabrics used to make them.
  • Variety.  They come in a wide range of products, offering a variety of sizes, insulation values, and costs.
  • More insulation than most closed-cell foam pads and air pads.

Cons:

  • Heavy.  Their hybrid design and thick fabric add up to more pounds.
  • Can be punctured.  Though they are resistant to punctures, it can be done.  Field repairs can be done quickly and easily, however.
  • Can be bulky.  Though they roll up smaller than some closed-cell foam pads, they are still larger than air pads.
  • Take time to pack up.  To deflate, you have to roll them up and slowly force the air out, which can take a while.
  • Cost.  Depending on type, they can be expensive.

Kayak Camping

When should you consider them?

These are great all-around sleeping pads that can be used in most situations.  If you are car camping, winter camping, or camping while biking, paddling, or kayaking, you may want to consider purchasing a self-inflating pad.  Because of the wide variety available, you should be able to find one that suits your needs.  Just consider your priorities while making your selection.  Is weight more important than insulation?  Is comfort number one?  Are you concerned with size (especially if kayaking, paddling, or biking)?

Air Pads

These are the newest type of pads to hit the market and are still changing as manufacturers develop new styles, production methods, and uses.  As the name implies, they are filled only with air, allowing them to compact down to small sizes and add little weight when backpacking.

Pros:

  • Extremely lightweight.  These are the lightest sleeping pads available and usually weigh less than 15 oz.
  • Comfortable.  Some air pads are designed to allow 3 inches of air for comfort.
  • Compact.  Air pads can be rolled down to the size of a water bottle, making them idea for ultra-light backpackers.

Cons:

  • Noisy.  They make a surprising amount of noise while sleeping on them.
  • Fragile.  Punctures are far easier, though repairs can be done in the field.
  • Cost.  These pads generally cost more than other sleeping pads.
  • Take time to inflate.  Even with a hand pump, it's going to take a few minutes to get ready.
  • Deflates with temperatures.  As the night gets colder, the air inside will constrict and deflate the pad a bit.
  • Bouncy.  It's filled only with air which means it isn't as stable as the other two types of sleeping pads.

Backpacking, limited weight and size

When should you consider them?

These pads can be used in almost any situation, but are especially useful for ultra-light backpackers or those with limited space.  If you're not sure whether or not to use an air pad or a self-inflating pad, consider this how your day will go.  After hiking all day through the wilds, you may not want to sit down and spend several minutes blowing up your pad.  Or perhaps you need the extra space in your kayak and decide that the noise is worth it if you can bring your DSLR camera along, in which case an air pad may be the way to go.

Some other things to consider ...

When choosing your sleeping pad, always keep in mind how you plan to use it.  Are you going to be hiking, boating, biking, or near your car?  Are you going to be using in only in the summer months?  Early spring?  Or even winter?  Who is going to be using it?  Only you?  A spouse?  A child?  Will you be bringing a pet?  All of these may influence which pad you choose to purchase.

R-Value

When selecting your sleeping pad, pay close attention to the R-value.  This number represents the insulation value of the pad and may mean the difference between a comfortable night's sleep or a night of shivering.  The R-value is a number between 1 and 10.  The higher the number, the colder temperatures you can sleep in comfortably.  If you're planning to camp throughout winter, find one with an R-value of 5 or higher.  Some brands may not have R-values printed on their pad but instead give the ideal temperatures where you can still sleep comfortably, usually in this format: Min. Temp.: 30° F/ -1° C.

Keep in mind that R-values can be stacked.  If you have a closed-cell foam pad with an R-value of 3 and a self-inflating pad with an R-value of 2.7, the combined R-value becomes approximately 5.7 (approximate because there may be some inefficiency in combining two separate pads that weren't designed to work together).

Be aware, there may be two versions of the same type of pad - usually an insulated version and one that isn't insulated.  The difference between the two is usually only found in the R-value.  Just because a pad is not insulated does not mean it has an R-value of 1, so be sure to check the R-value before purchase.

Baffle

This is the "texture" or pattern of the sleeping pad.  Some have a dimpled appearance, others have horizontal or vertical baffles (like ridges), and others are some combination of the three.  When it comes down to it, baffle type really depends on personal preference and how you sleep.  Back sleepers may prefer one type over stomach sleepers.  People who move around a lot while sleeping may decide one style works better, while people who stay still choose a different style.

Grab a sleeping pad and get camping!

Just like our mattresses at home, the sleeping pads we use while camping will vary depending on our individual needs and preferences.  If you can't borrow a pad to try it out before making a purchase, read reviews online - not only for the pad in question, but also for the company who makes it.  Many backpackers and campers who leave reviews will mention the type of use they bought it for and may include other useful details like time of year, temperature, their size, quirks (like noise or how long to deflate), etc. 
But in the end, trust your instincts.  After all, everyone's needs are a little different when it comes to sleep, especially sleeping in the great outdoors.
Continue reading

The Importance of a Dock Line

The Importance of a Dock Line

When using a boat, it seems fairly obvious that a dock line would be a vital piece of equipment.  How else would you secure the boat to the dock when done for the afternoon?  Most of us don't consider, however, that the dock line is just as vital for those using man-powered vessels.

True, most man-powered vessels are small enough and light enough to be pulled up on shore.  That doesn't mean that you shouldn't have a dock line secured to your vessel, no matter what type of vessel it is.

Why?  Here are four vital (and sometimes hilarious) reasons why you should have a dock line on your kayak or SUP.

Headstands on SUPs

1.  Group Yoga

Although a dock line isn't actually used in the execution of SUP yoga, it's a useful thing to have on hand.  Why?  That dock line can be used to secure your SUP to another or even to a buoy or a dock.  This way, you don't have to worry about floating away while trying to master Shirshasana.

Woman Pulling Kayak Over Shallow Water

2.  Shallow Water

Most kayaks, SUPs, and even canoes sit high enough in the water to cross shallow waters, but even they can run aground.  When your SUP is loaded with gear, carrying it often isn't an option.  Having a dock line means you can remove your weight from the SUP, allowing it to ride higher in the water, and pull it through the shallow areas.  Personally, I've had to do this several times when going down rivers in the later summer when the water levels sometimes drop until only a few inches cover the rocky river bottom.

Canoe and Kayak Tied to Buoy

3.  When Shore Isn't An Option

There are times when you may not want to drag/carry your vessel up the shore.  Rocks, cliffs, and even crowds may make it impossible, or at least very difficult, to carry your SUP or kayak up the shore.  With a dock line secured to your SUP, you can easily tie it off to a buoy, tree, or even a rock to ensure it doesn't float away while you rest.

Girl Paddling Kayak

4. Towing

There are two situations when your dock line may need to serve as a quick-tow rope as well.  In my personal experience, these situations often revolve around children ... or husbands.

First, children.  While rowing long distances, they may tire sooner or may not be able to fight the current/wind as easily as you can.  Simply secure one end of the dock line to the back of your vessel and secure the other to the front of theirs.  This ensures they never fall too far behind, can take breaks when they need to, and will be able to stick with the group during windy days. 

Do not do this when venturing down rapids.  The rope can easily get caught on rocks/branches/debris and may end up putting both of you in a dangerous situation.  Never allow a child to traverse a rapids alone in their own vessel.

Second, husbands.  In particular, I'm thinking of my own who prefers to cruise along on his PWC while I stick to my kayak.  One summer day, I set out to investigate a bit of marshlands along the edge of the lake while he got his PWC.  After struggling for a bit (it's a two-stroke and takes a bit of love to start the first time), he got it running only to have it shut down on him about two hundred yards from shore.  I had to tow him back to the dock, which was easy with my dock line.

He learned a very important lesson that day - PWC work better if they have gas in their tank.

And me?  I don't think I've ever laughed that hard.

Dock Line Attached to SUP

Whether you prefer kayaks, canoes, or SUPs, consider purchasing a dock line like the one offered here at Stillwater Outdoors.  It pays to be prepared, especially when bringing husbands along.

Continue reading

Snow, Ice, and Cold Water: Winter Water Safety Guide

Snow, Ice, and Cold Water: Winter Water Safety Guide

Summer is ending, fall is fast approaching, and temperatures are already starting to drop ... but don't think that means you have to pack your SUP away for good.  Winter brings unique opportunities to the sport.

As well as some serious dangers.  Never underestimate the cold.  If you plan ahead, prepare, and respect Mother Nature, there is no reason why you can't go and see a world very few have had the pleasure of witnessing ... a winter wonderland seen from the water.

Woman by lake, winter

1.  Know the Water Temperature

We all know that SUPing is swimming, and though few of us plan to end up in the water, it happens.  What most don't realize is that water doesn't have to be that cold to be dangerous.  50 degree (F) water is a lot colder and more deadly than 50 degree air.  Water temperatures between 70 and 60 degrees are considered dangerous.  Water temperatures below 60 degrees are considered very dangerous/immediately life-threatening.  At 60 and below, you may experience total loss of breathing control, inability to control gasping, and hyperventilation.  For more information on the dangers of cold water, check out the National Center for Cold Water Safety at www.coldwatersafety.org

If the water temperature is cold, it doesn't mean you can't SUP.  It does mean that you should take extra precautions to ensure that you can get out of the water quickly and safely if you do fall in.

2.  Watch the Weather

This is important any time you go out on an adventure as no one likes to be caught in torrential rains or unusually blistering heat.  In the winter, however, the danger ramps up.  That slight breeze that cooled you during the summer months now adds a wind-chill factor that could put already cold temperatures below freezing.  And, honestly, who wants to set out on their adventure during a blizzard?  Check the weather days in advance.  Keep checking it as your target date approaches.  And if there are any risks, don't go.  Try again at a later, safer, time.

blizzard by mountains

3.  Make a Float Plan

We mentioned this in our post about general water safety/SUP safety.  Make a detailed plan of your trip - where you will put in, where you will paddle, any potential "safe" areas where you may shore up in case of trouble, when you will leave, when you will return, who is going with you, what you will be wearing, and so on.  Seems like a lot, but getting stranded in the winter is far more dangerous than getting stranded in the summer.  Daylight temperatures in the winter months are cold enough, but when that sun goes down and the temperatures plummet, you don't want to be stranded outside.  Make a plan, give it to someone you trust, and stick to it.

And when choosing your route, consider this:  Can you swim to shore?  If not, you should probably choose a different route.  Hug shorelines and stick to shallows whenever possible to reduce the risk of drowning and/or hypothermia if you end up in the water.

4.  Never Paddle Alone

In the summer, it can be tempting to venture out on your own because there is less risk.  Conditions are ideal and dangers are minimal.  In the winter, however, having someone with may save your life.  The cold makes everything difficult and fine motor skills quickly disappear with gross motor skills following soon after.  Having someone there to help in case of an emergency is vital, so never go out alone.

campfire in snow

5.  Make an Emergency Kit

Whether you plan to be out for an hour or all day, it's a good idea to have a winter-specific emergency kit with you while paddling.  In it, include things you might need if you do end up stranded overnight in the cold.  Matches/a lighter, water, a blanket (to save space consider placing it in a bag that can be compressed and sealed to remove air), chemical heating packets for hands and feet, flashlight, etc.  If you do have to go to shore and can't make it back to your car before nightfall, you're going to need a way to stay warm.  Pack with that in mind.  Consider a safety beacon or flare as well, just in case.

6.  Leash and PDF

In the summer months, it is tempting to SUP without actually wearing your PDF.  On calm, warm water, there is less of a risk of drowning, especially for those who are strong swimmers.  In cold water, however, swimming skill isn't enough to save you.  Wear your PDF at all times.  If you fall into cold water, the shock of it may make it difficult or impossible to swim.  Always keep a leash attached as well.  When the water is cold and swimming is difficult, you don't want your SUP to get out of your reach.

7.  Dry Suit or Wet Suit?

Both can be used, though they work in very different ways and are more useful in different situations.  A wet suit works as you might think - it absorbs water and holds it against your body, allowing your body heat to warm it.  This warm water then becomes an insulating layer between you and the rest of the water.  A dry suit keeps you dry by repelling the water completely and uses the air trapped near your body to keep you warm.  In winter weather, particularly, a dry suit may prove more comfortable.  No matter which you use, keep in mind that layers both under and over can provide extra comfort and safety.  Also make sure that your clothing doesn't restrict your movements, both on the board and if you happen to fall in the water.

Wool Socks

8.  Consider Clothing Carefully

Cotton is a no-no.  Why?  It absorbs and holds water.  Instead, use layers that hold heat, not water, like fleece and/or wool.  Dress in layers as well.  Lightweight layers first, then warming layers (like fleece and wool) and waterproof/repellent layers last.  Hats are important, so make sure to have one.  While in the cold, it's important to keep your hands and feet warm as well, so invest in good gear.  Waterproof boots are nice, though they can be awkward in the water.  Wet suit booties are a great alternative, though they mean your feet will be wet the entire time.  Wear gloves that are waterproof and warm or consider neoprene (wet suit) options.

Two things to keep in mind when dressing for winter paddling:

Dress for the water temperature, not the air temperature

Layer properly for adjusting temperatures throughout the day (so you can remove layers when sweating and add them again when it cools)

8.  Extra Gear to Consider

A dry bag is a great investment for any water enthusiast.  Consider one, or two, for your winter paddling adventure.  One can carry your emergency gear as well as your float plan while the second can be used to store any layers you shed or extra clothing you bring along.  This will ensure they remain dry and ready to be reused later.  A thermos of something hot to drink is always a great idea.  Bring two, one to drink on your way out to the paddle spot and one for after you are finished for the day.  That added heat after a day of cold-weather paddling will definitely be appreciated.  Also consider a change of clothing.  After you return to your car, changing out of anything wet will help raise your body temperature faster and will make the trip home far more comfortable.

mountain lake in winter

Winter offers just as much beauty and fun as summer, as long as you don't underestimate the dangers.  Here at Stillwater Outdoors, we want to encourage you to try something new, something adventurous, while remaining as safe as possible.  Preparation and prevention are key, so the next time you venture out, please take an extra moment to review this guide and, as always, stay safe.

Continue reading

Whitewater SUPing: The Next Adventure

Whitewater SUPing: The Next Adventure

You've tried and subsequently fell in love with stand-up paddle boards ... but flat water just doesn't hold the same appeal it once did.  Sound familiar?  You're not alone.  Many who learn the sport on flat water find themselves wondering what's next?

Stillwater Outdoors has the answer or, rather, we know the answer.  Whitewater SUPing.  That's right.  It's no longer reserved for kayaks and rafts and is quickly becoming a nation-wide competitive event.

Now, we don't suggest that you dive into competition immediately.  Like any sport, there is a fair bit of learning and practice involved.  Where whitewater is concerned, this training stage is vital as it can, quite literally, save your life.  Here are a few other tips for those looking to try a new, exciting use of their SUP.

1.  Gear Up

If you already have an SUP, you should already have the basic gear needed for being on the water: PFD, whistle, paddle, leash, and SUP.  Whitewater SUPing requires a few additional pieces of equipment.  First of all, inspect your SUP.  There are many different types designed for many different uses.  For whitewater rafting, you want a stable, durable board (inflatable boards work well) that has considerable rake (an upturning of both the front and back) to ensure you remain on top of the waves instead of being pulled under them.  If you don't have much rake on your SUP, adjust your placement on the board by standing farther back to keep the nose of the board up while riding the rapids.

Whitewater Helmets

Consider buying a helmet, knee and elbow pads, and potentially a different PFD.  The ACA (American Canoe Association) recommends an inherently buoyant lifejacket for all whitewater rafting.  You may need a new leash as well (if you choose to use one).  For whitewater SUPing, the ACA recommends that you wear a leash at waist level, accessible with both hands, and it must have a quick release feature.  For more information on the basic equipment needed for different types of SUP uses, check out this video released by the ACA:

SUP Leashes and Lifejackets

2.  Consider Taking a Class

For those who have no whitewater experience, we highly recommend taking a class with a certified whitewater instructor.  The ACA offers a list of classes offered, including classes for those wishing to become certified as an instructor.  Check it out here:

American Canoe Association: Whitewater Classes

Whitewater Rafter Overboard

Whitewater SUPing is swimming.  You will fall off.  You will have to swim.  This is yet another reason why taking a class is important.  Swimming in a rapids isn't the same as swimming in a lake or even a calm, flat river.  There are unseen obstacles, plenty of places to get caught, and the water is volatile making it difficult to tell which way is up in some situations.  Take the time to become a better swimmer before attempting any serious rapids.  The more comfortable you are in the water, the less likely you will be to panic and the more likely you will be to walk away unscathed.

3.  Start Small

Once you feel comfortable understanding the proper way to handle and remain safe on whitewater rapids, the next step is to try it out.  We recommend starting small with a class I or class II rapids.  Though it may be easier, don't always practice on the same rapids.  Exposure to new situations, different currents, and new obstacles will help you grow as a paddler and will help you be better prepared to move up to the next class of rapids.

Couple in Canoe Going Down Rapids

4.  River Etiquette

Like almost everything in life, there are certain rules that should be followed while on the river.  Canoe & Kayak offers a wonderful blog post about river etiquette that outlines the basic rules of the river.  One of the most important?  Those upstream on the river have the right of way.  Just like when you cross the road, always look before entering the river to be sure you don't cut off another river user and create a potentially dangerous situation.  You can find Canoe & Kayak's complete list of river etiquette here:

Canoe & Kayak: River Rules

5.  Pick Your Rapids

Now that you have a better understanding of what you need to get started on your SUP whitewater adventure, you probably need to find the perfect location.  American Whitewater offers an interactive map that shows you the class of rapids, its current water level, and when the information was last updated.  While there, consider offering your support by becoming a member or by donating (money or time) to help preserve our river systems.

American Whitewater Map

Kayak in Rapids

This is just a basic outline of some of the factors to consider before starting whitewater SUPing.  It is a challenging, fun way to get more out of your SUP experience.  Just remember to be careful, plan ahead, and, as always, have fun.

Continue reading